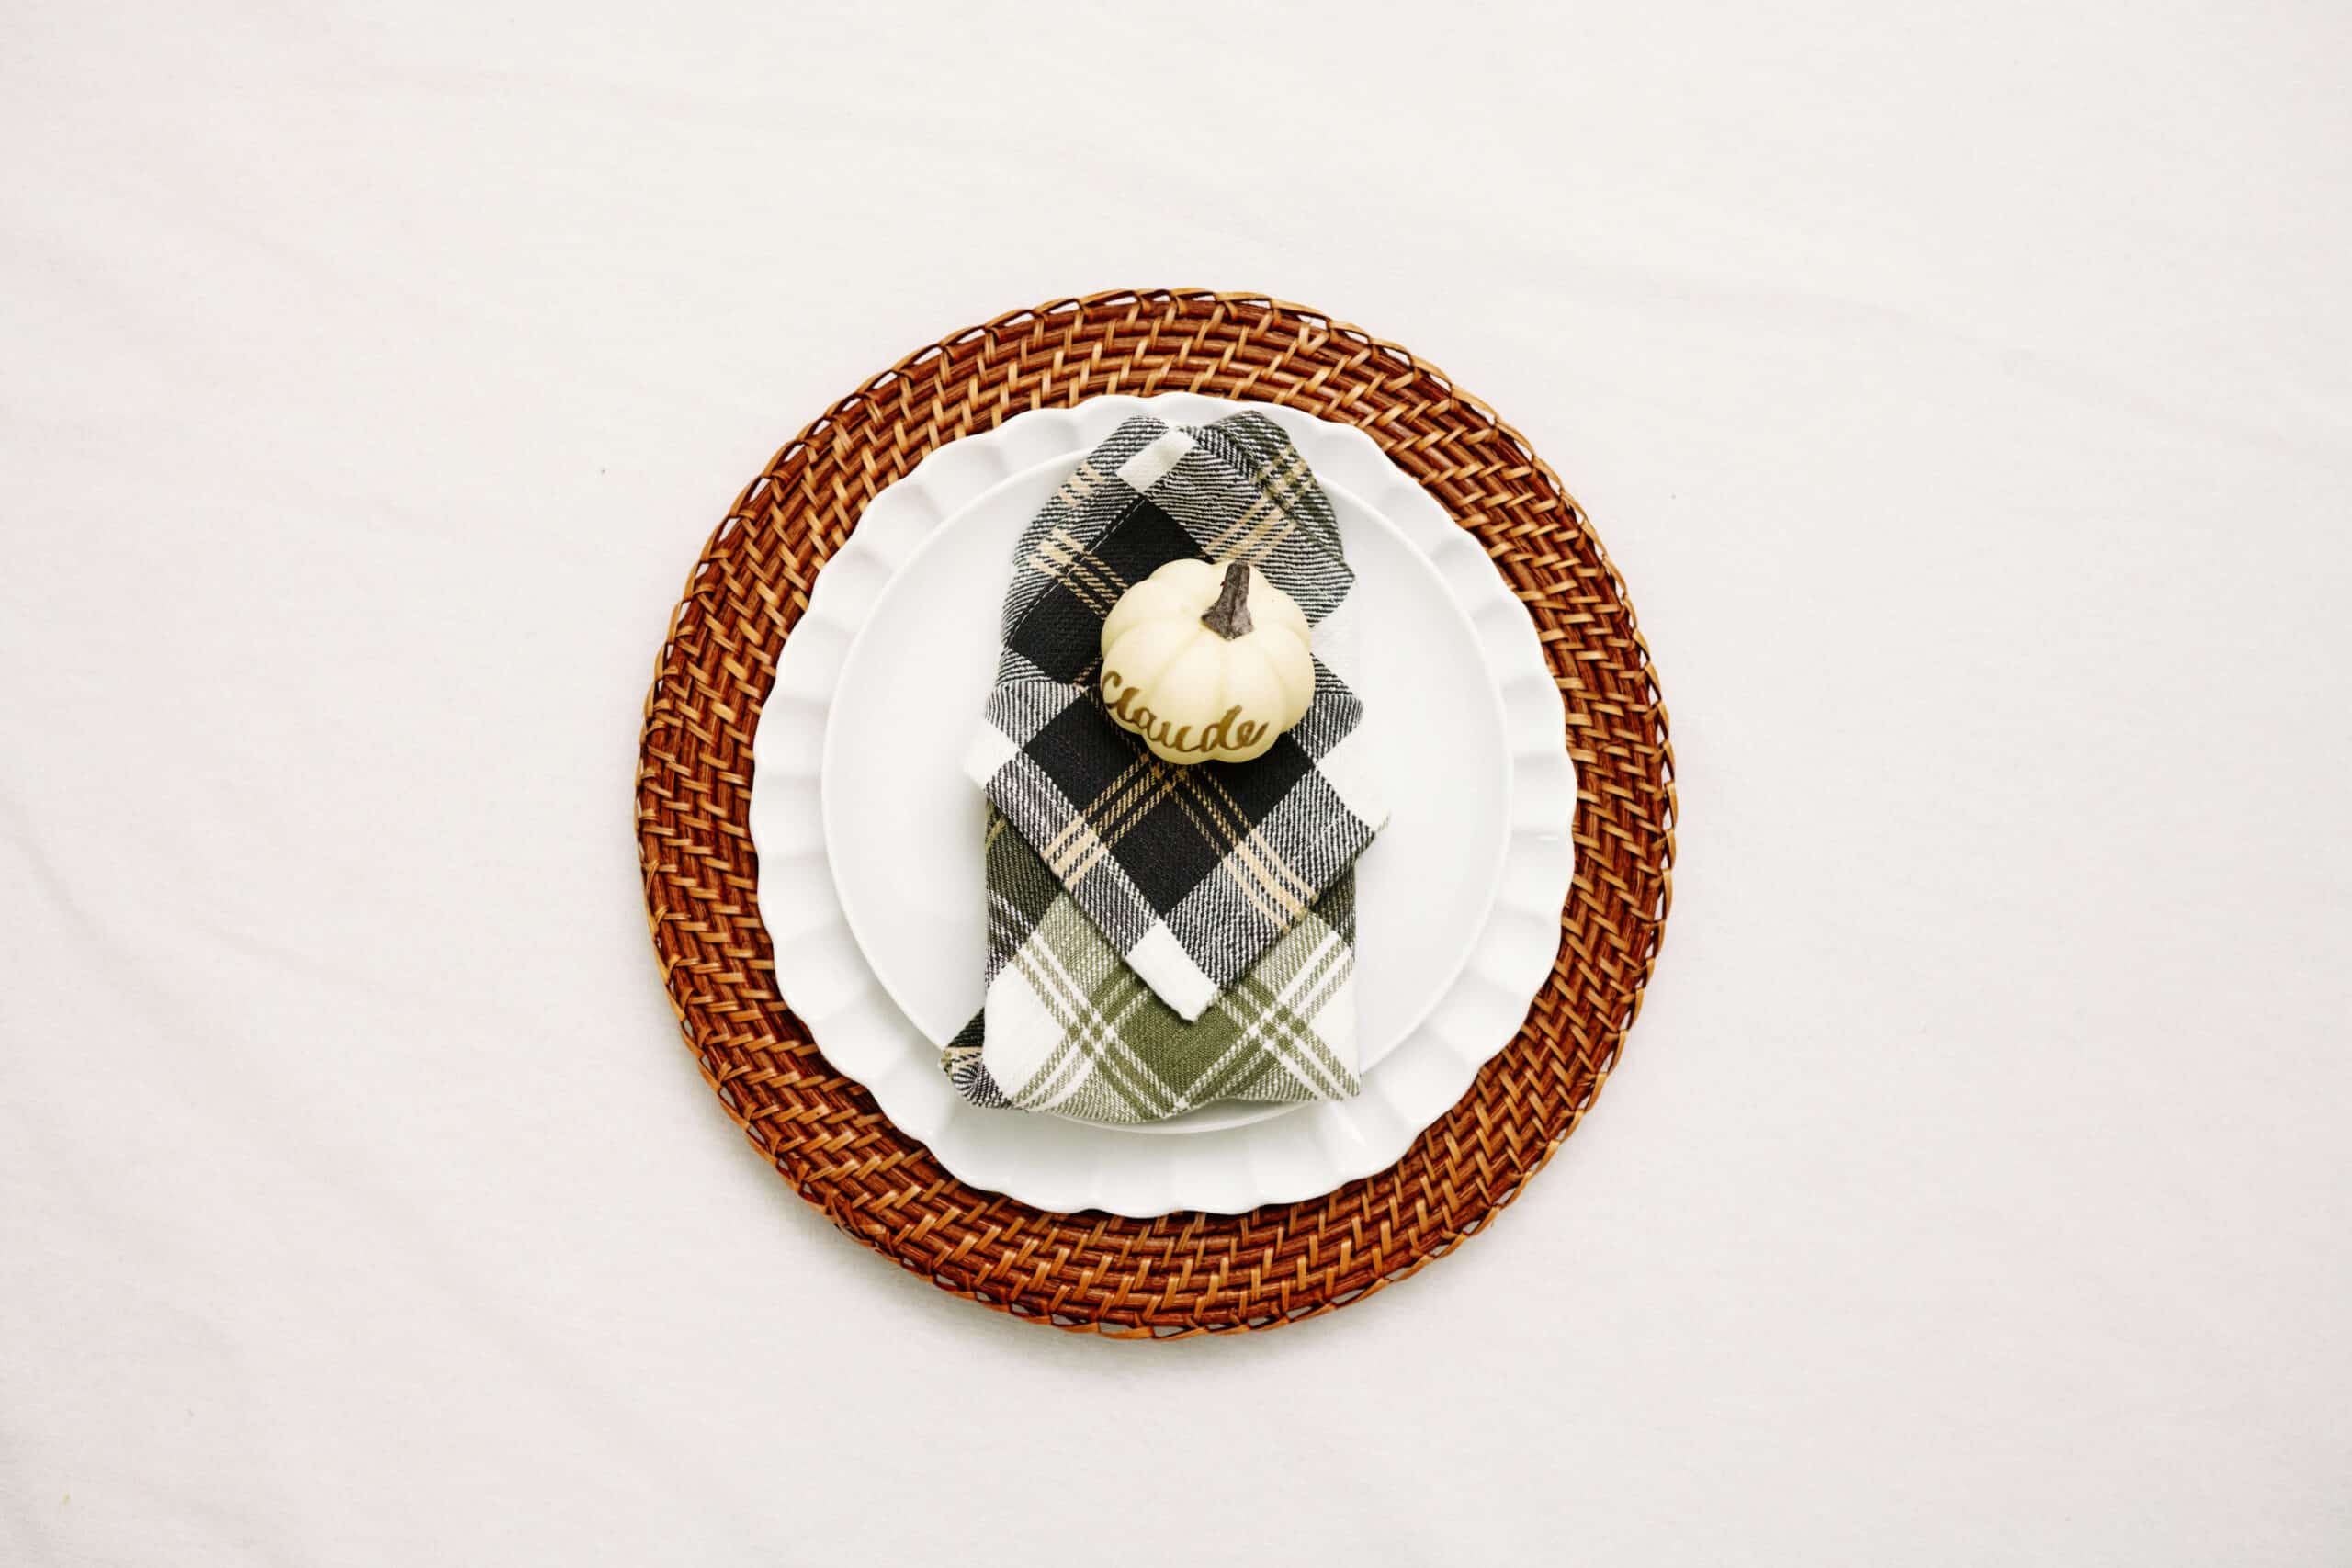
When hosting for the holidays or any dinner party, your tablescape not only sets the ambiance, but it also provides a conversation starter for family and friends. If you’re looking to take your hosting skills to the next level and add that little extra something to your dining table, try one of these easy napkin folding ideas.
Except for the Christmas tree napkin fold, these easy napkin folding ideas are extremely versatile and work for lots of different seasons and occasions. All you have to do is swap the napkin for another color or print to match whatever you’re celebrating.
I promise, folding a napkin isn’t as complicated as it seems. In fact, once you get the hang of napkin folding, it’s a pretty quick and simple way to give your table some added pizazz.
Below are my favorite easy napkin folding ideas with step-by-step instructions and videos. Take your time, practice, and before you know it, you’ll be a napkin folding master with a beautiful table that’ll surely impress your guest.

Tips for Folding Napkins
Consider the Napkin Material
When folding a napkin beyond its traditional rectangle fold, I recommend using cloth, cotton napkins.
Although the fancier paper napkins can help elevate a table, they can be too small or rip when folding.
Cloth napkins are a really easy way to up the ante when hosting. They make any set up look luxurious and using cloth napkins one of my favorite ways to elevate a table for a dinner party.
Although I love linen napkins, it’s best to use traditional cotton napkins for special napkin folds. Cotton napkins have more structure than linen napkins and hold the folds much better.
Utilize Starch
For best folding results, spray a little starch onto your napkins and give them a good iron or steam. The starch will make your napkin a little more rigid – perfect for napkin folding – and ironing/steaming will rid the napkin of any unwanted creases.
PRO TIP: If you mess up during your napkin folding, quickly re-iron or re-steam to start fresh, then try again!
Fold on a Spacious, Flat Surface
Once your cotton napkins are starched and wrinkle-free, you’re ready to start folding them! Fold your napkins on a spacious, flat surface.
Most napkins are between 17 – 20 inches, and when spread out, take up a bit of space.
Easy Napkin Folding Ideas
Whether you’re looking for something simple or more intricate, here are my favorite easy napkin folding ideas with step-by-step instructions to achieve each style.
Simple Ring Fold
This simple ring fold utilizes easy accordion-like folding to create it’s rippled appearance.
- Step 1: Start with a square, flat napkin.
- Step 2: Fold the top of the napkin toward you, about a quarter of the way down.
- Step 3: Rotate the napkin so that the ends of the napkin are at the right of your surface, like a diamond.
- Step 4: Grab the top corner of the napkin and fold it toward you forward and back accordion style, until you reach the center of the napkin.
- Step 5: Holding the top of the napkin in place, repeat the accordion fold with the bottom of the napkin until the center. You can rotate the napkin if it helps you keep the folded side in place.
- Step 6: Bend the napkin in half away from you to reveal a pleated design.
- Step 7: Using a napkin ring, slide it over your napkin to the center, hen adjust the pleating and folds accordingly.
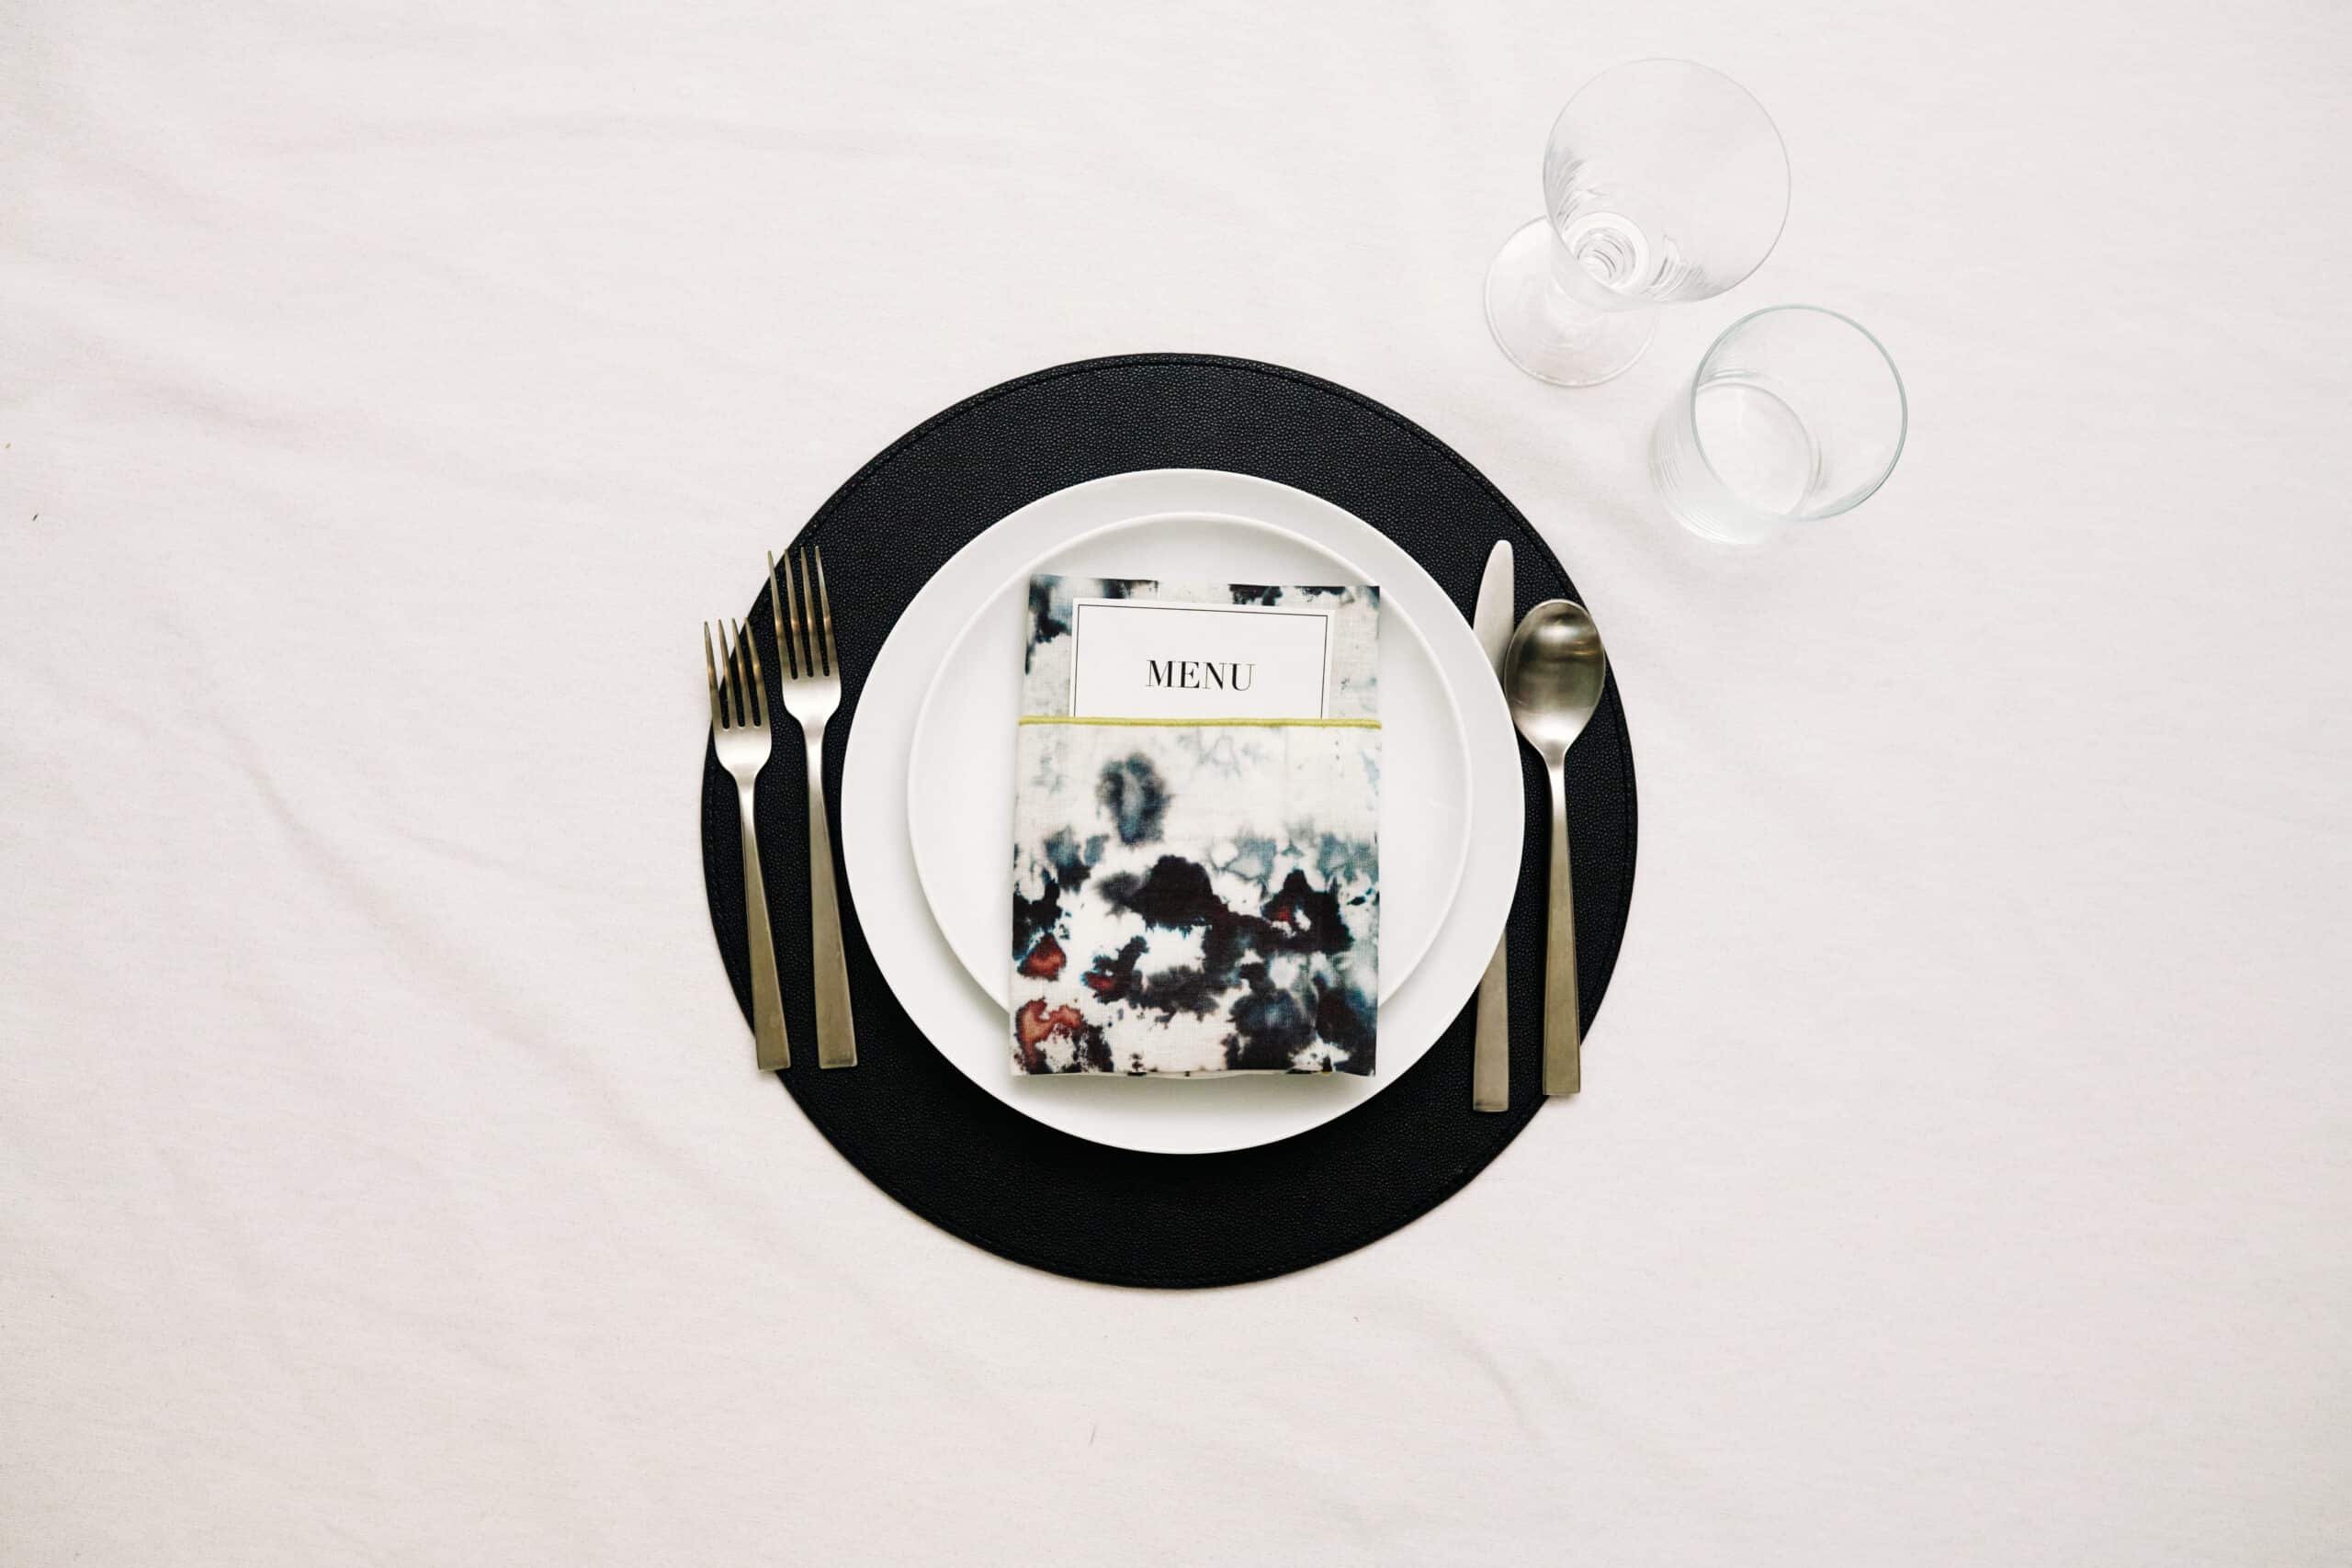
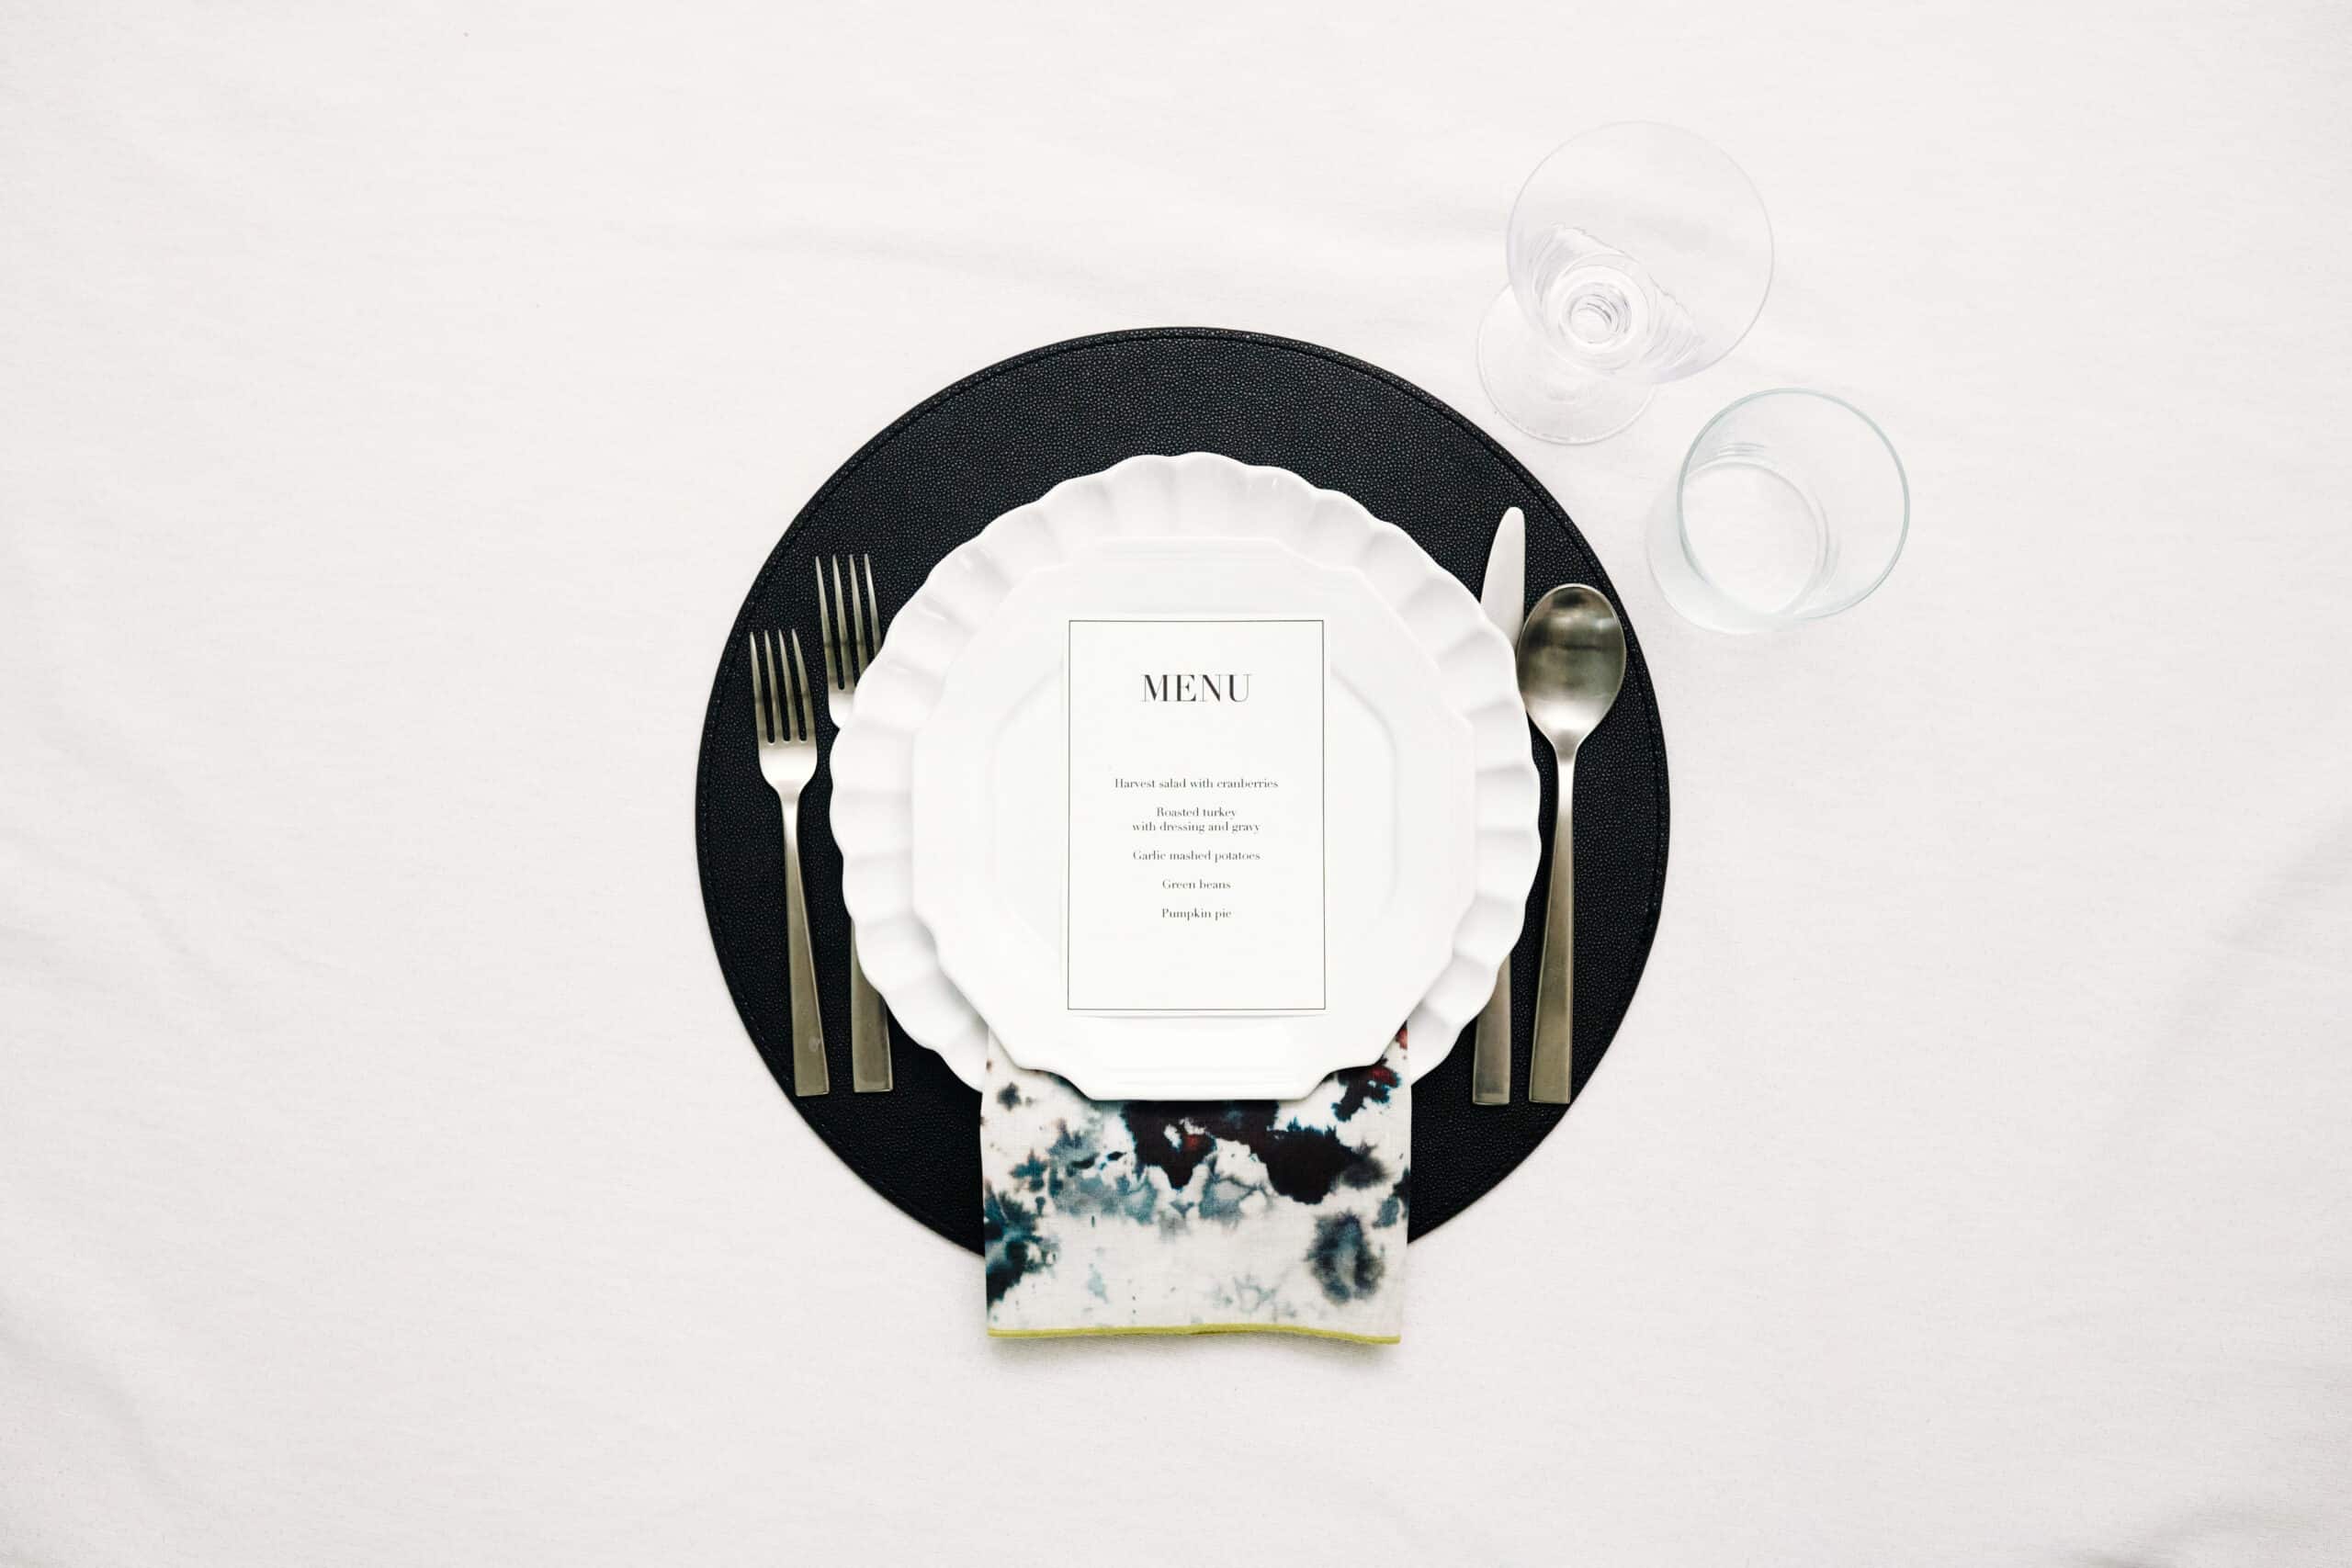
The Classic Pocket Fold
This classic pocket fold is a lot easier than you think. If you plan to have menus at the table, this is my favorite way to fold a cloth napkin with them.
- Step 1: Start with a square, flat napkin.
- Step 2: Fold the top of the napkin toward you, about a quarter of the way down.
- Step 3: Then, fold the bottom of the napkin up so that it overlaps thee edge your just folder down.
- Step 4: Flip the napkin over, then fold both sides in, so that the napkin has been folded into thirds.
- Step 5: Flip the napkin over again and add a menu or name card into the little pocket that you created.
Other Classic Pocket Fold Variations
Angled Pocket Fold
This angled pocket fold adds a little extra something with a diagonal pocket detail. Tuck in a flower, an herb sprig, or a festive accent.
- Step 1: Start with a square, flat napkin.
- Step 2: Fold the napkin in half from left to right, so that it’s taller than it is wide.
- Step 3: Fold the napkin in half again, this time from bottom to top. It should be a smaller square and the “ends” of the napkin should be in the top right corner.
- Step 4: Take the top layer of the top right corner and fold it down to the bottom left corner.
- Step 5: Flip the napkin over, then fold both sides in so that the napkin has been folded into thirds.
- Step 6: Flip the napkin over again and add a flower, accent, or even utensils into the angled pocket.
Pointed Pocket Fold
- Step 1: Start with a square, flat napkin.
- Step 2: Fold the napkin in half from left to right, so that it’s taller than it is wide.
- Step 3: Fold the napkin in half again, this time from bottom to top. It should be a smaller square and the “ends” of the napkin should be in the top right corner.
- Step 4: Rotate the napkin so that the ends of the napkin are at the top of your surface, like a diamond.
- Step 5: Taking the top layer, fold it about halfway down your napkin.
- Step 6: Flip the napkin over, fold both sides in so that the napkin has been folded into thirds, and then the bottom of the napkin.
- Step 7: Flip the napkin over again and add a flower or name card into the napkin pocket.

Plate Wrap Pocket Fold
- Step 1: Start with a square, flat napkin.
- Step 2: Take the bottom of the napkin and fold it up about an inch. Then fold that section again, about a third of the way up. The edge of the napkin should be hidden.
- Step 3: Repeat with the opposite half of the napkin. On the second fold, fold it about two thirds of the way up, so that it overlaps the top section. The napkin should be long lengthwise from left to right, and the bottom portion of the napkin should be about two thirds of the height.
- Step 4: Carefully, turn the napkin over, then place a plate face down in the center of the napkin.
- Step 5: Fold the two sides of the napkin over the plate like how you would wrap a gift.
- Step 6: Flip the plate and napkin over to reveal a wrapped plate. Stick a name card or menu in the pocket.
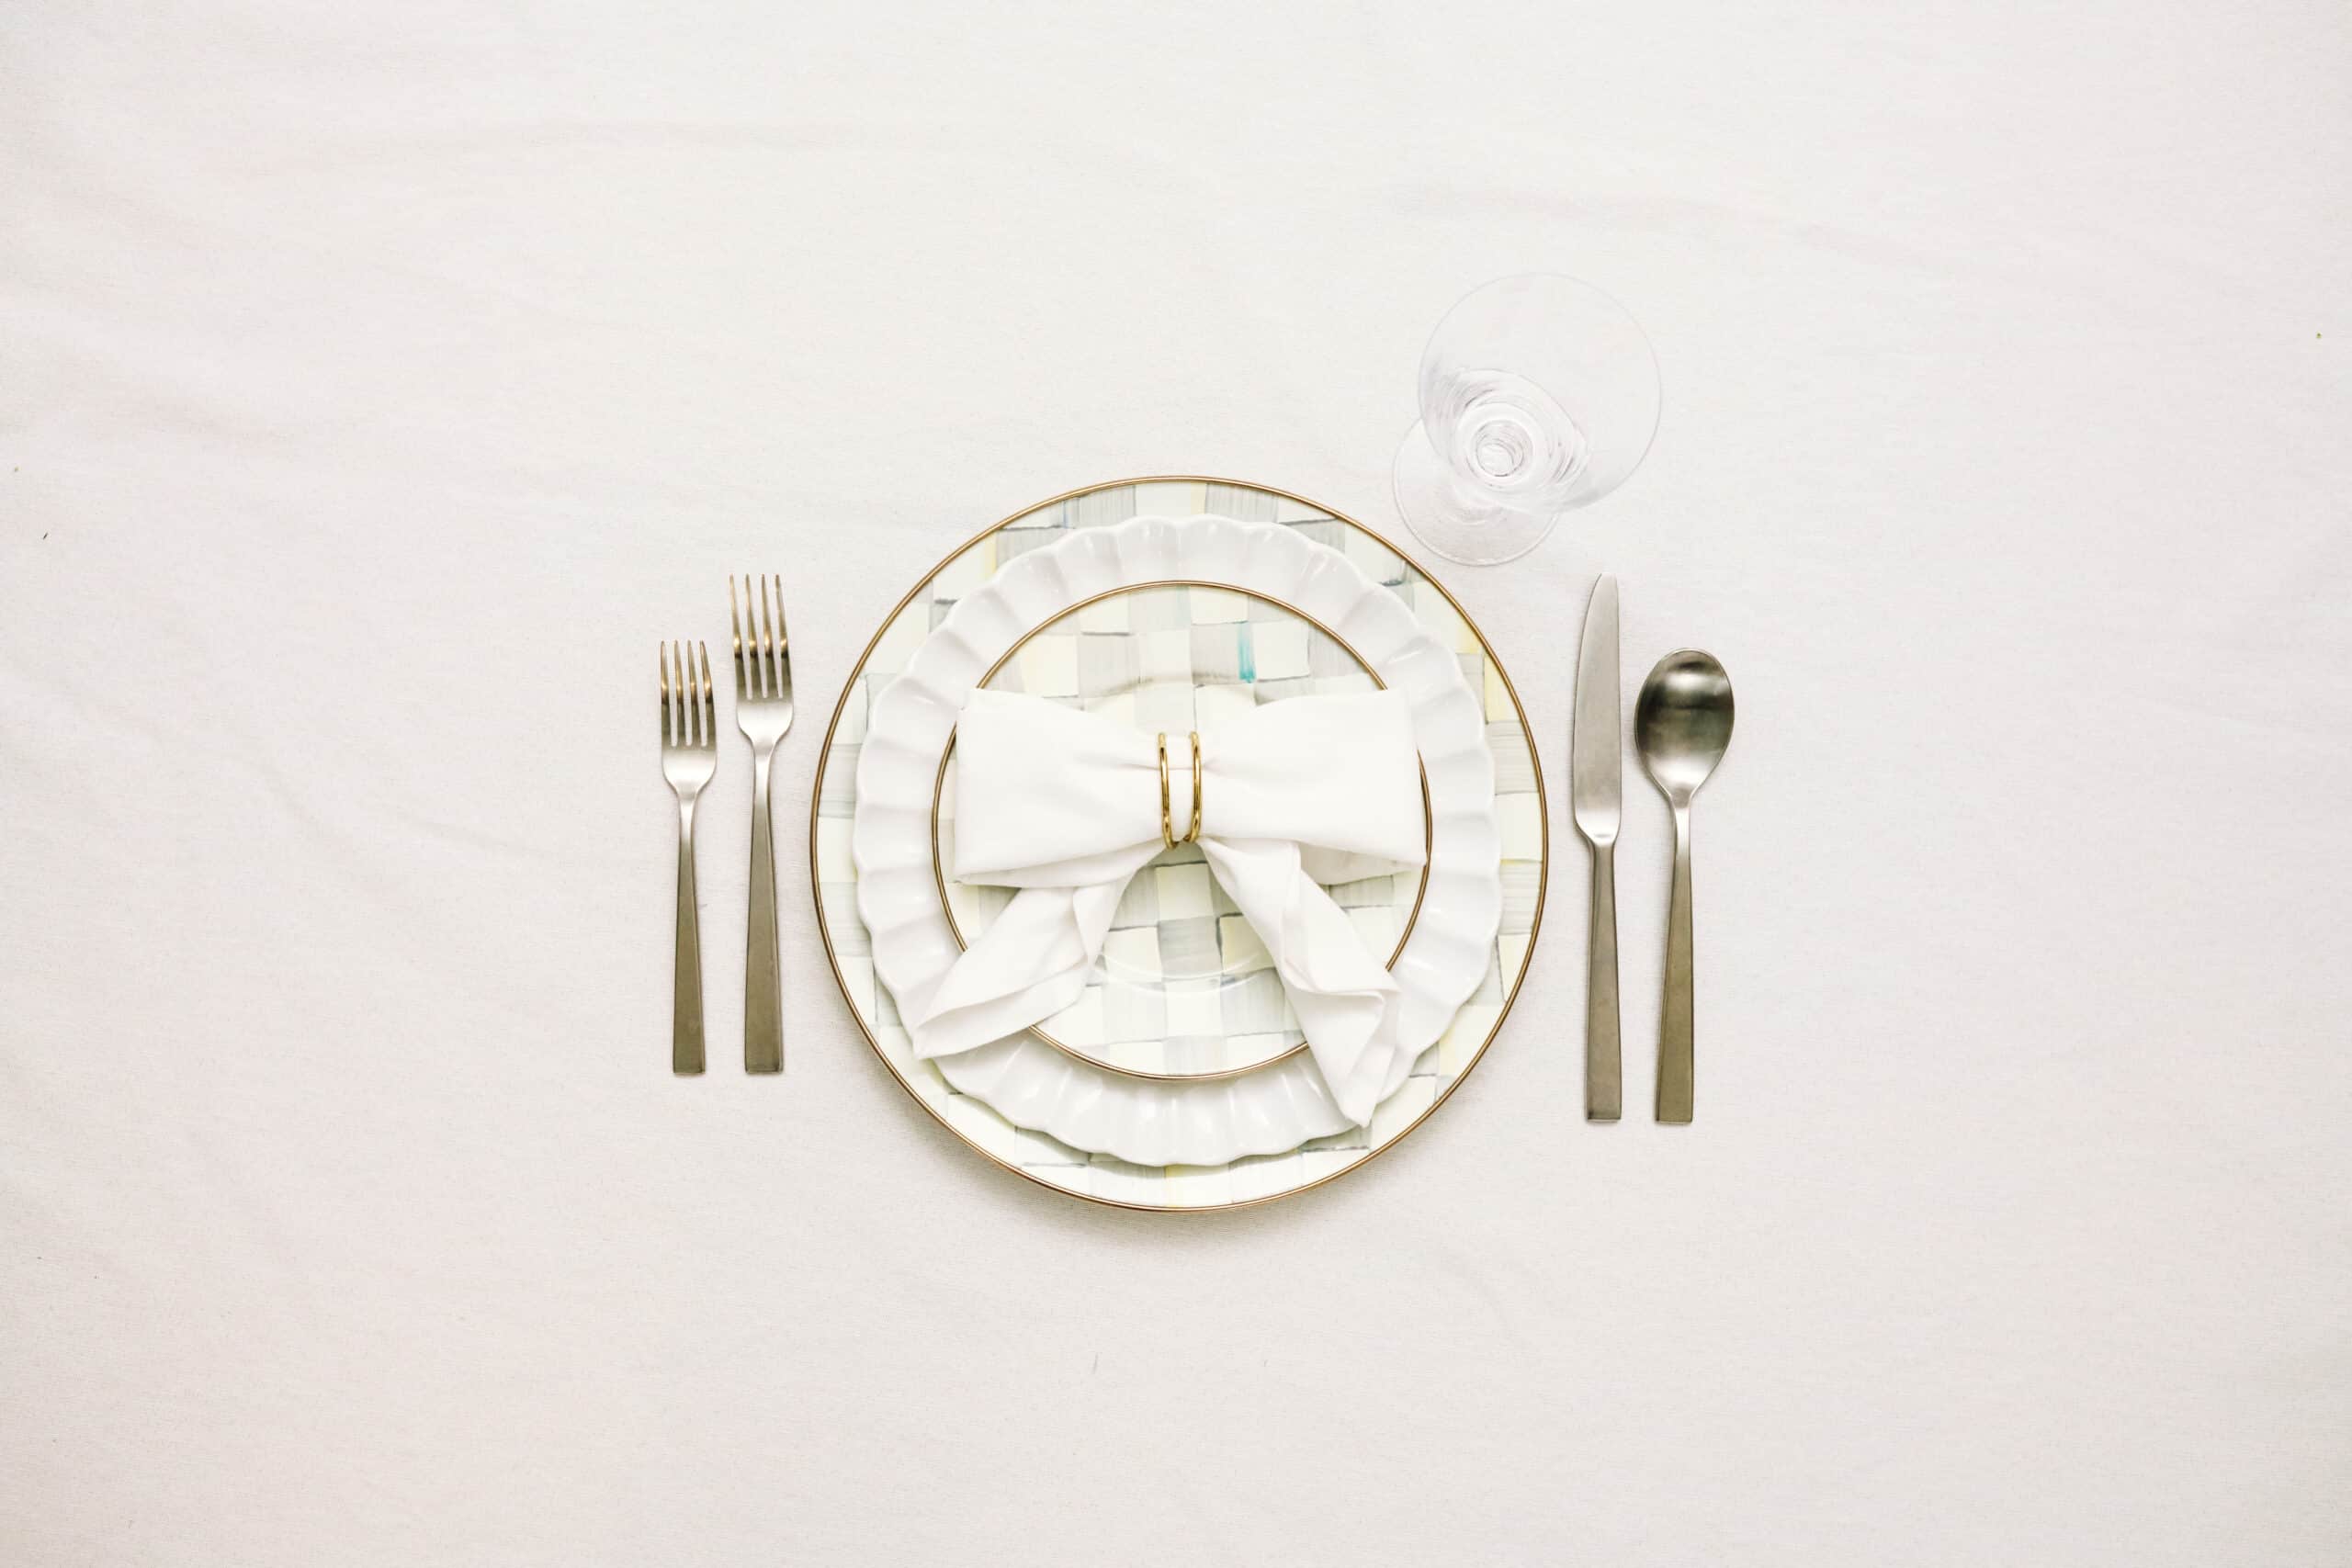
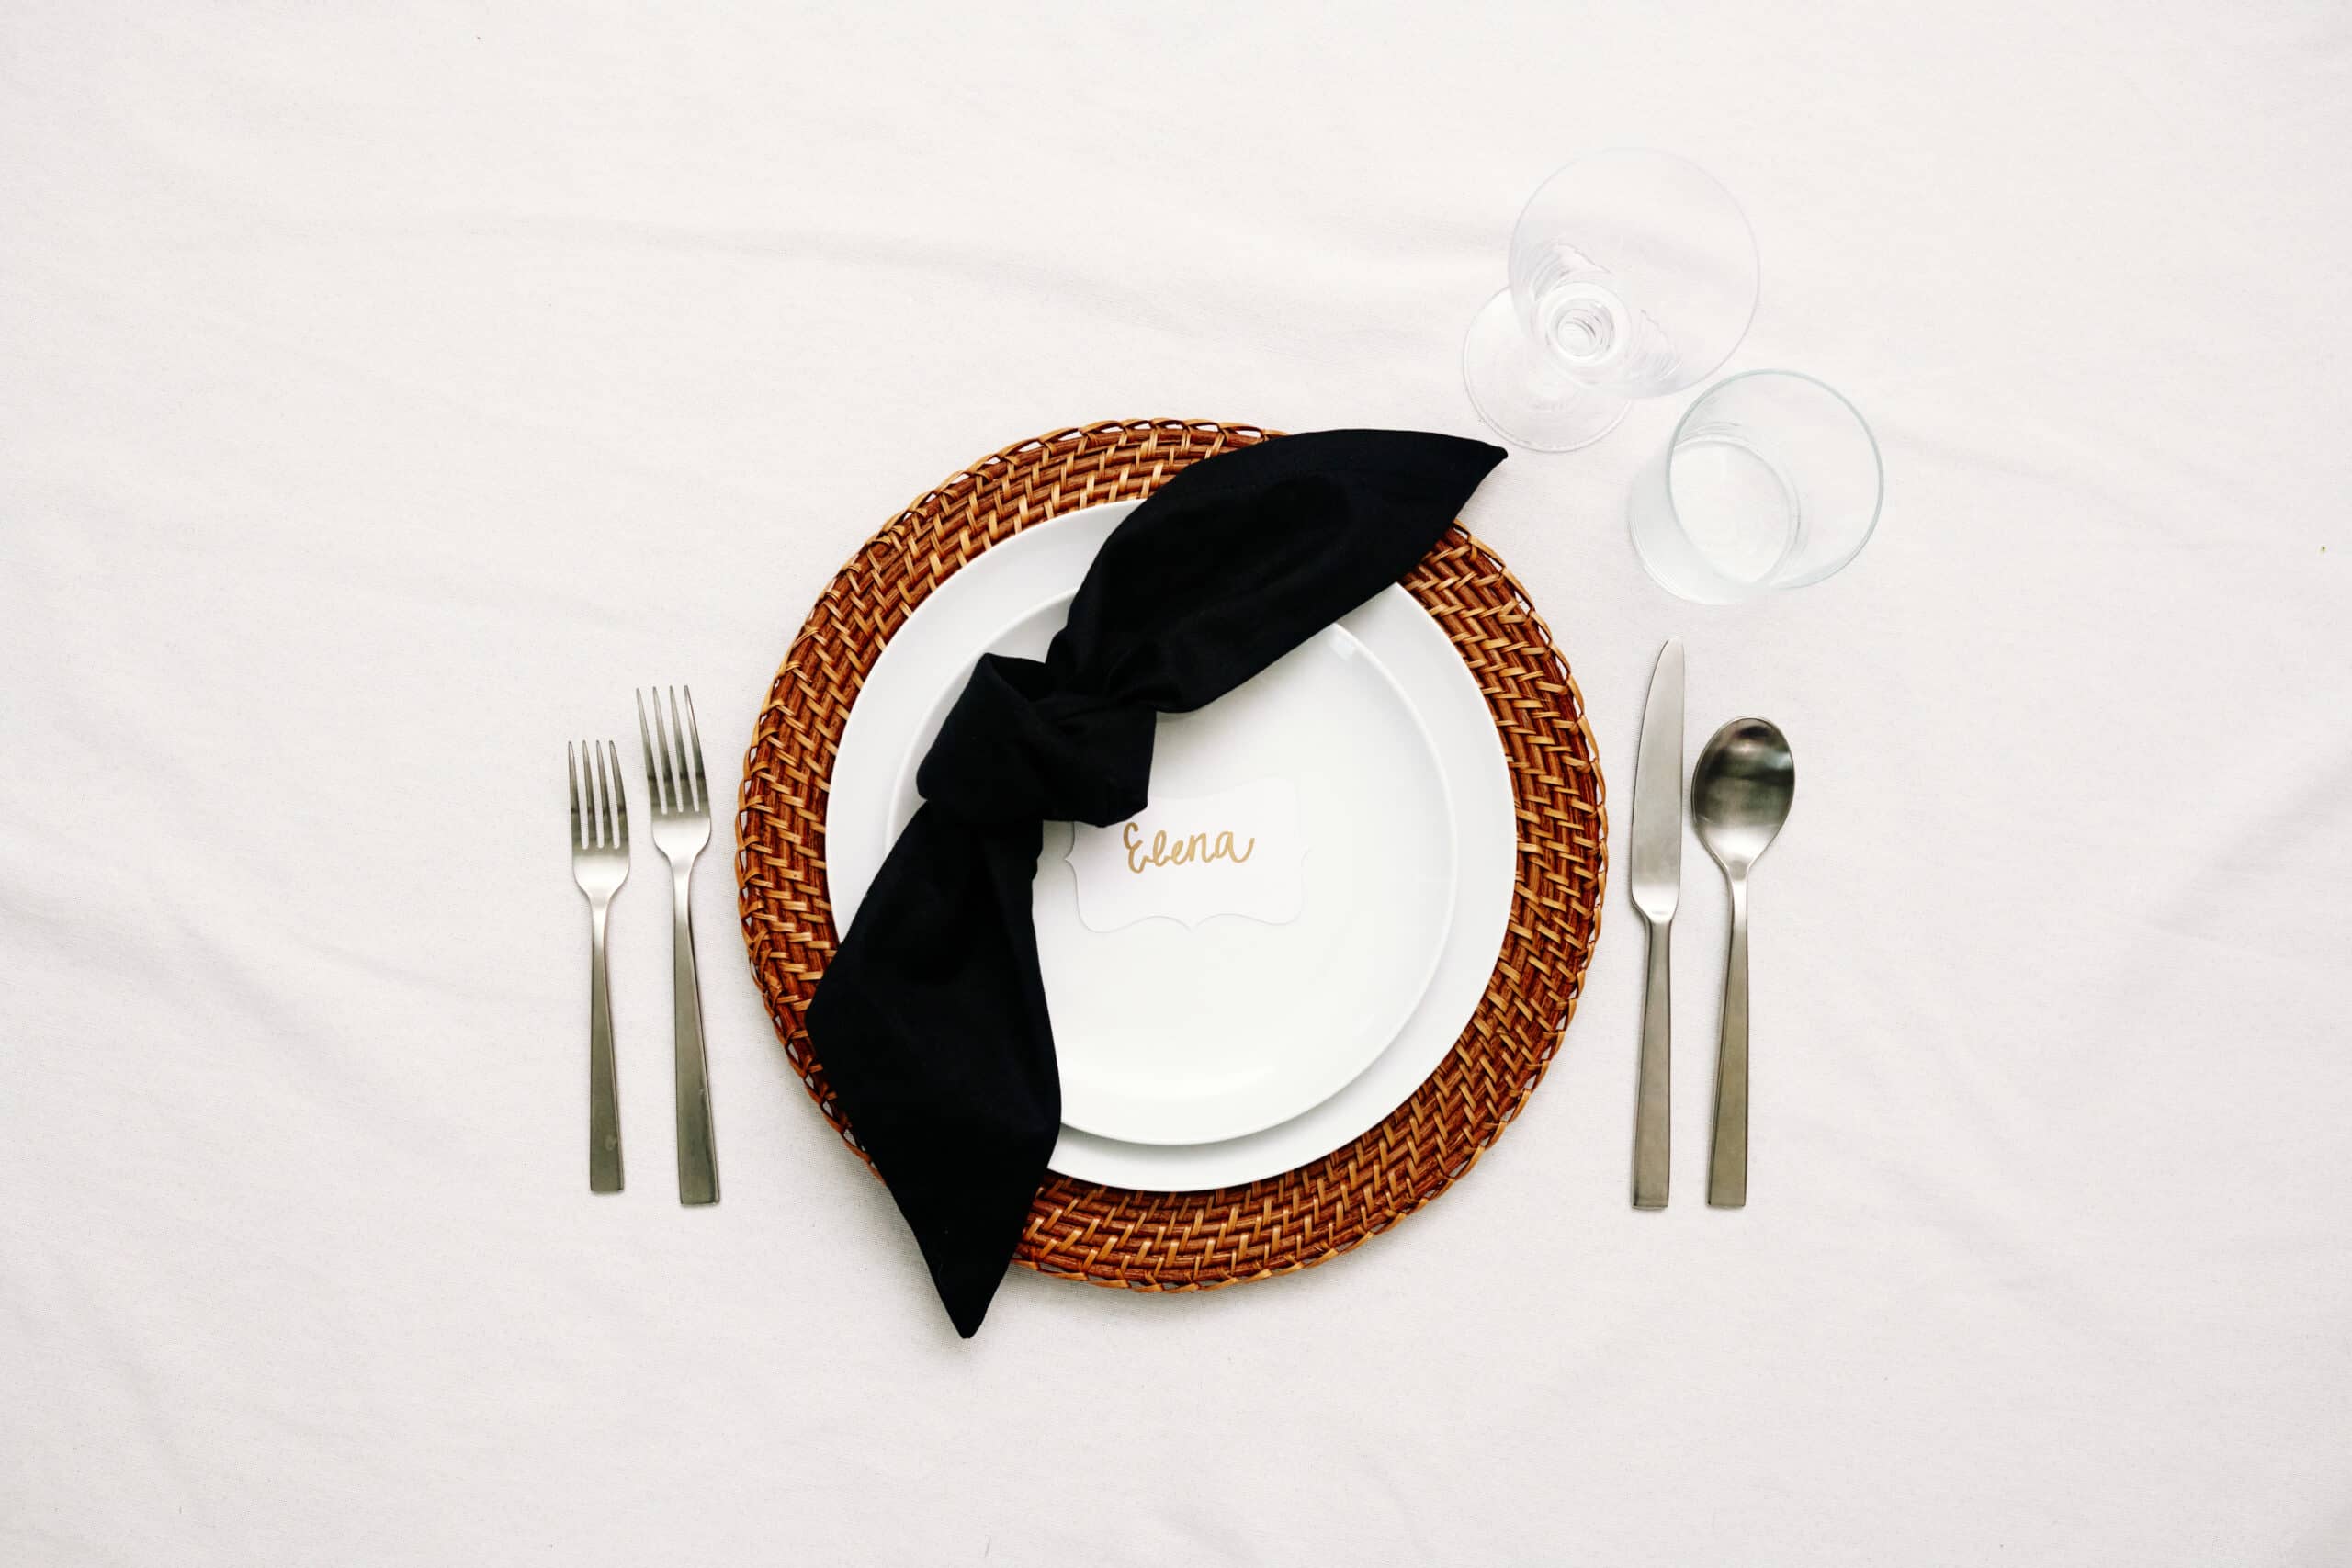
Bow Fold
- Step 1: Start with a flat napkin facing you with its corners to the sides like a diamond.
- Step 2: Fold the napkin in half from bottom to top so it creates a large triangle.
- Step 3: Starting from the top tip of the triangle, fold your napkin down about an inch or so.
- Step 4: Repeat this step and continue to fold the napkin over itself until you can’t anymore. The napkin should look like a long folded scarf.
- Step 5: Take one side of the napkin and fold it over itself at a diagonal. Repeat with the other side so that both ends are crossed over each other. Try to make each end even.
- Step 6: Using a napkin ring, slide it over one side of the napkin to the center so that it pinches the middle.
- Step 7: Turn the napkin over and make any adjustments to even your napkin bow and its ends.
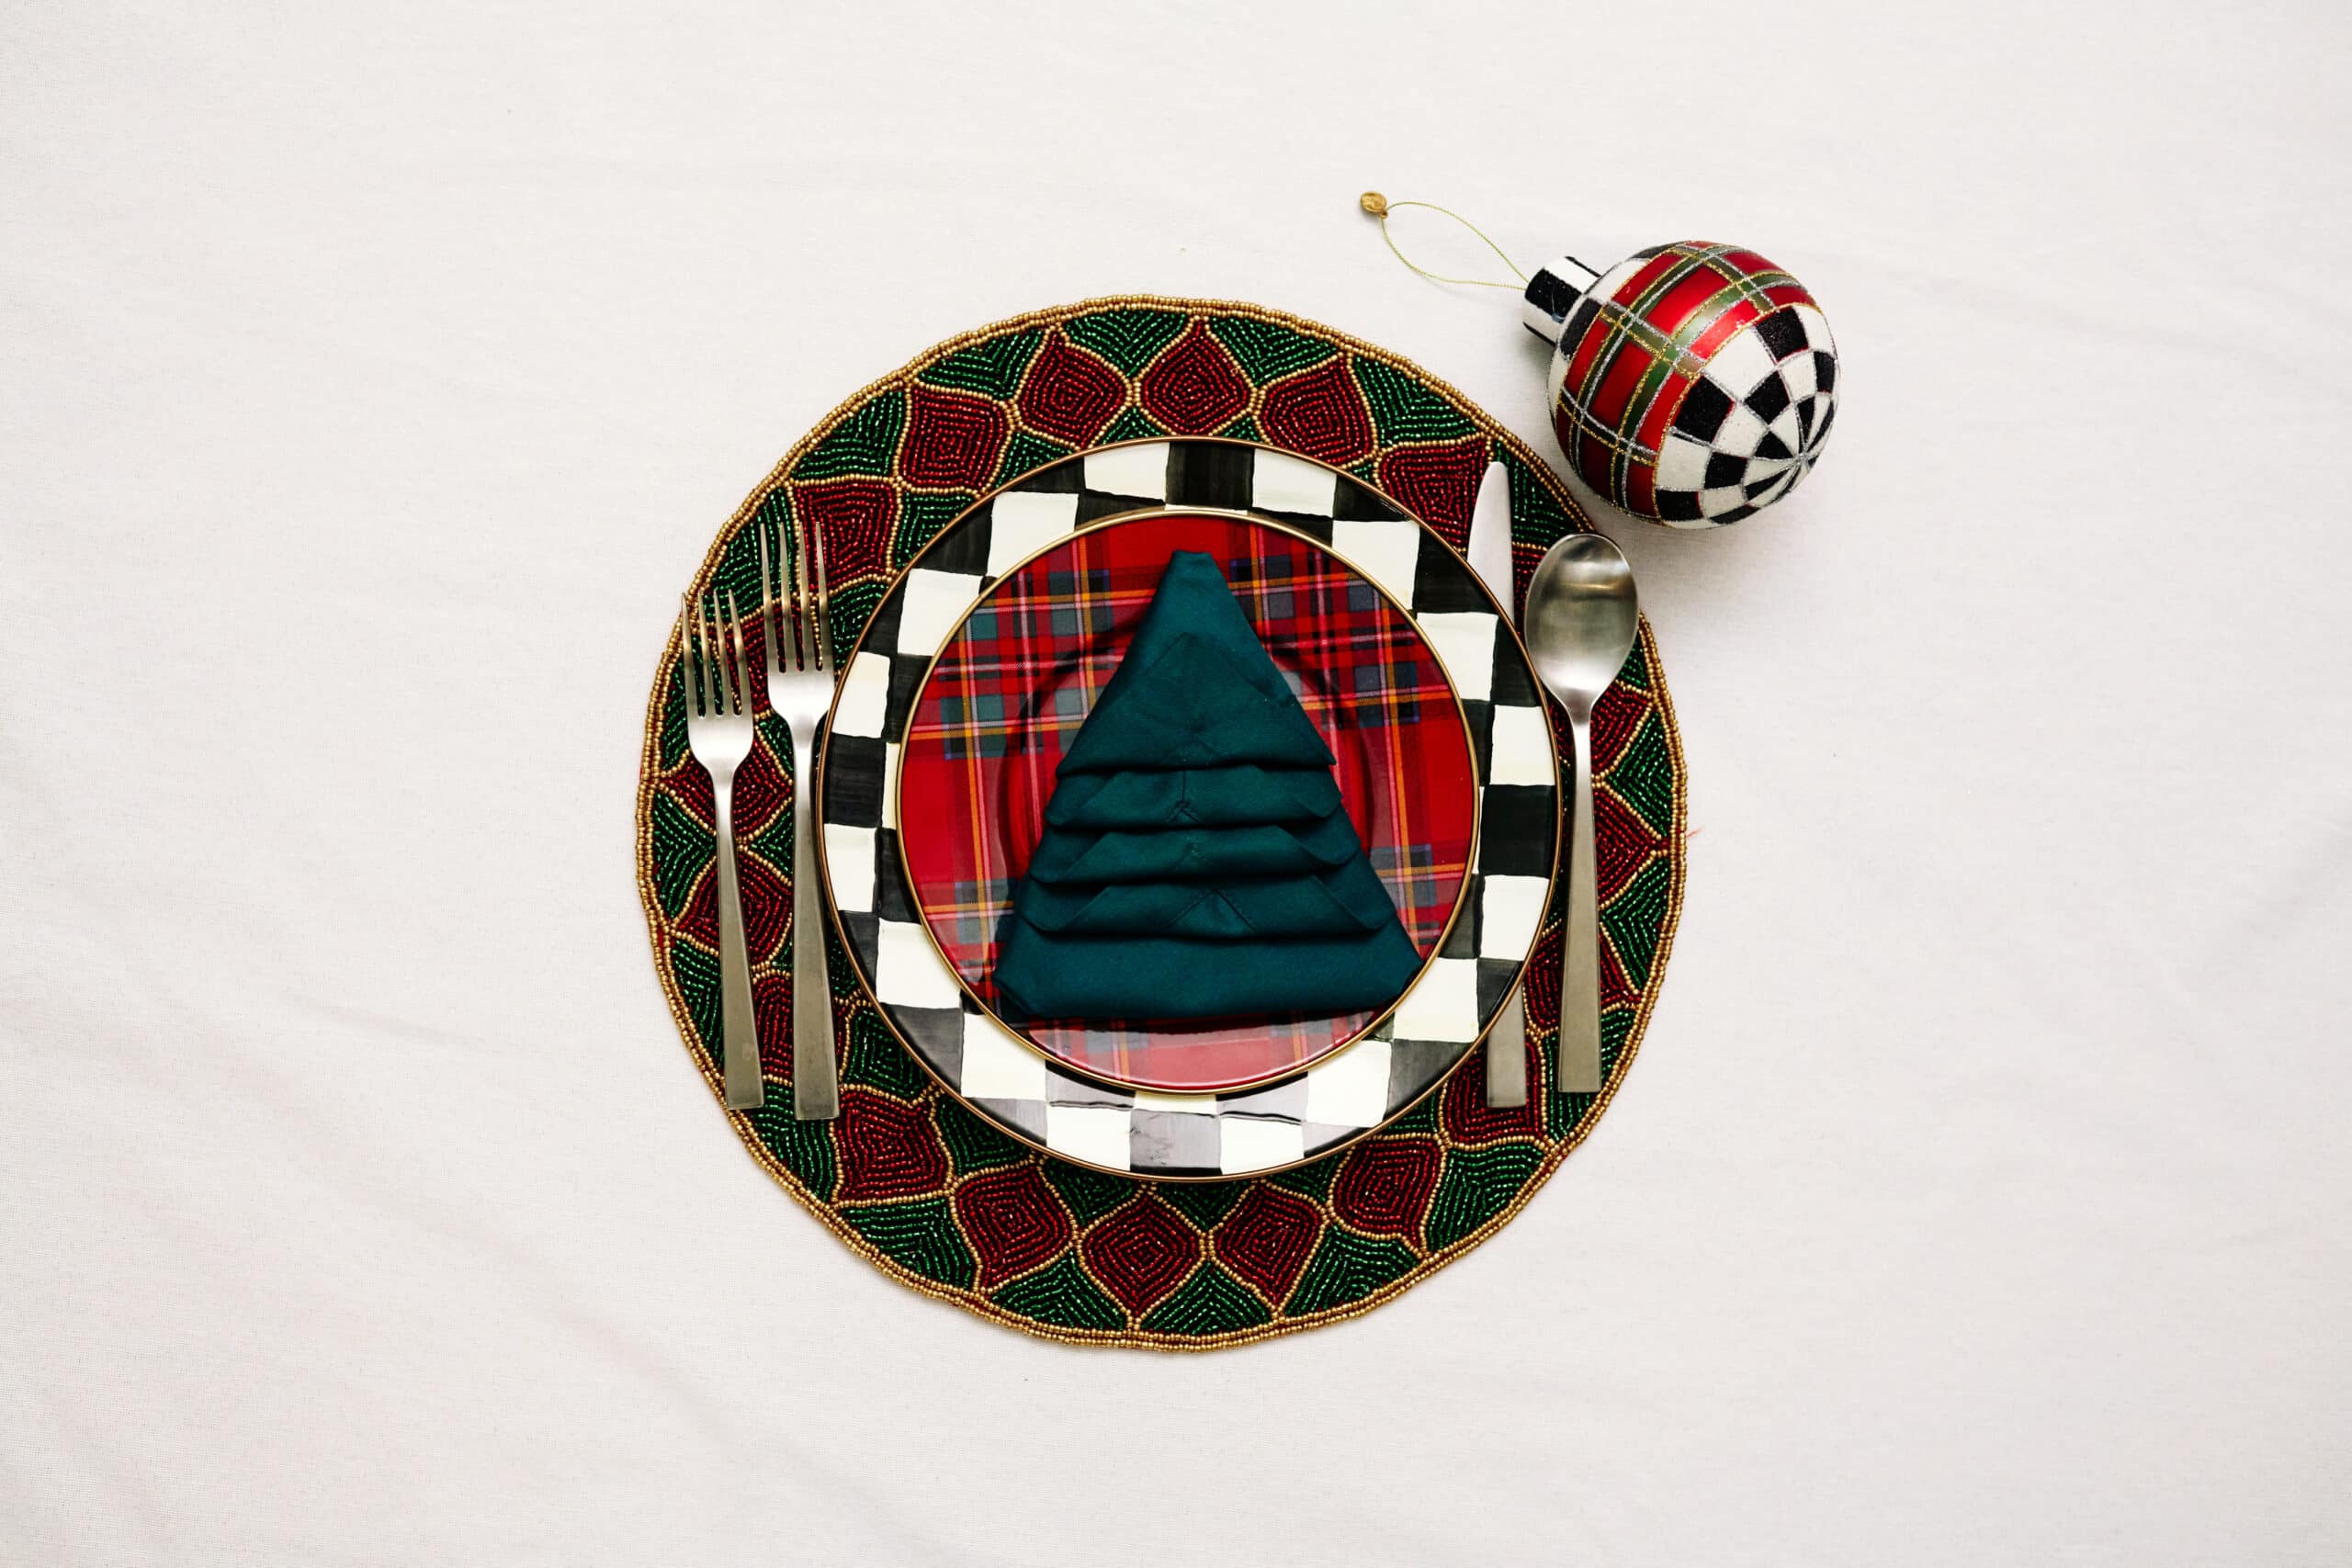
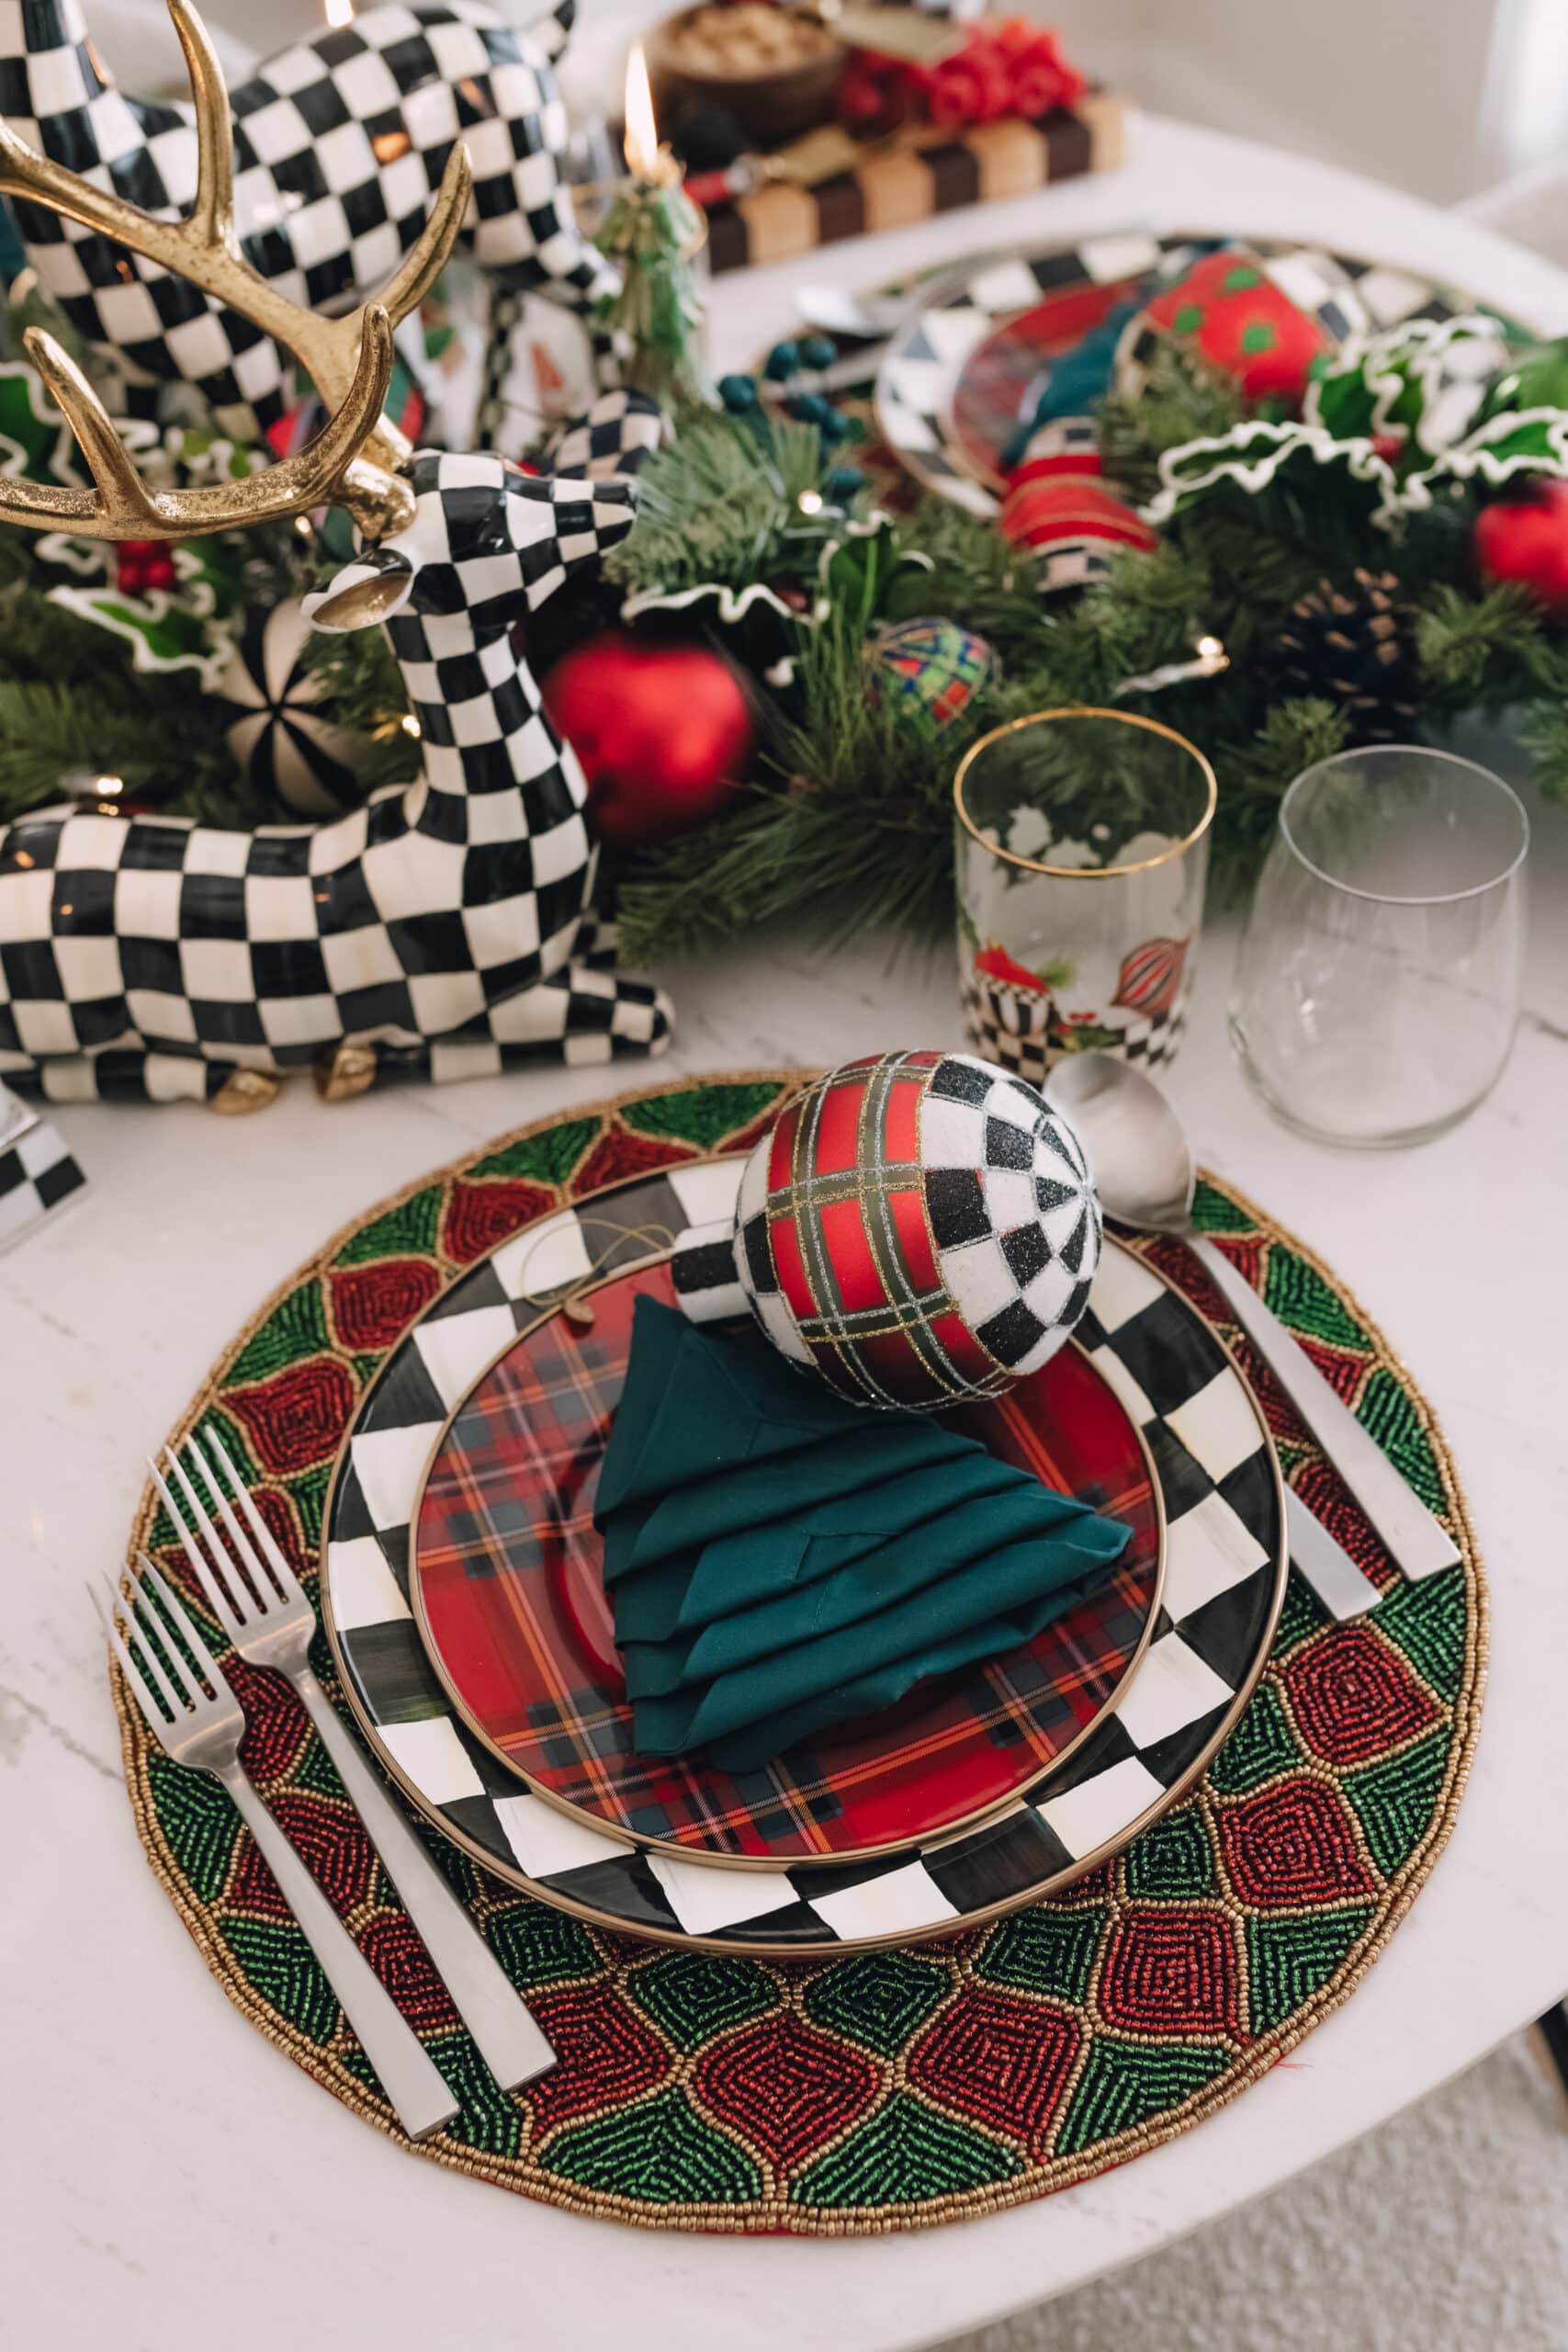
Festive Christmas Tree Fold
This was the year I finally learned how to fold a napkin like a Christmas trees. This napkin folding takes a little practice, but it’s so worth it in the end. I mean, how cute!
- Step 1: Start with a square, flat napkin.
- Step 2: Fold the napkin in half from top to bottom.
- Step 3: Fold the napkin in half again, from left to right, so that it makes a smaller square.
- Step 4: Rotate the napkin so that the open “ends” are facing you, like a diamond.
- Step 5: Take the top layer of the napkin and fold it up to nearly the top of the napkin, leaving a tiny gap and a bit of space around the edges.
- Step 6: Repeat with the remaining layers, staggering each fold so that you can see the layer below it.
- Step 7: Flip the napkin over.
- Step 8: Fold the outer corners to the opposite side. This should create an almost-triangle shape with a pointed bottom.
- Step 9: Flip the napkin over again so that the narrow part of the tip, or top of the triangle-like shape, is at the top.
- Step 10: Starting at the top, fold the flap up. Continue folding each flap up, tucking each layer under the previous layer to hide he pointed corner for your Christmas tree napkin fold.

The 3-Pocket Utensil Fold
When you traditionally set a table, your silverware goes to the left and right sides of your plate. But for something more modern, try this 3-pocket utensil napkin fold
- Step 1: Start with a square, flat napkin.
- Step 2: Fold the napkin in half from top to bottom.
- Step 3: Fold the napkin in half again, from left to right, so that it makes a smaller square.
- Step 4: Rotate the napkin so that the open “ends” are in the top right corner.
- Step 5: Peel back the top layer in a diagonal manner so that the corner touches the bottom left corner.
- Step 6: Take the second layer and fold it under the first layer. Do not tuck it all the way in, leave a bit of space. Repeat with the third layer.
- Step 7: Flip the napkin over and fold both sides in so that the napkin has been folded into thirds.
- Step 8: Flip the napkin over again. You should have 3 diagonal pockets. Slip an individual utensil into each pocket for a layer effect.
Other Napkin Fold Ideas
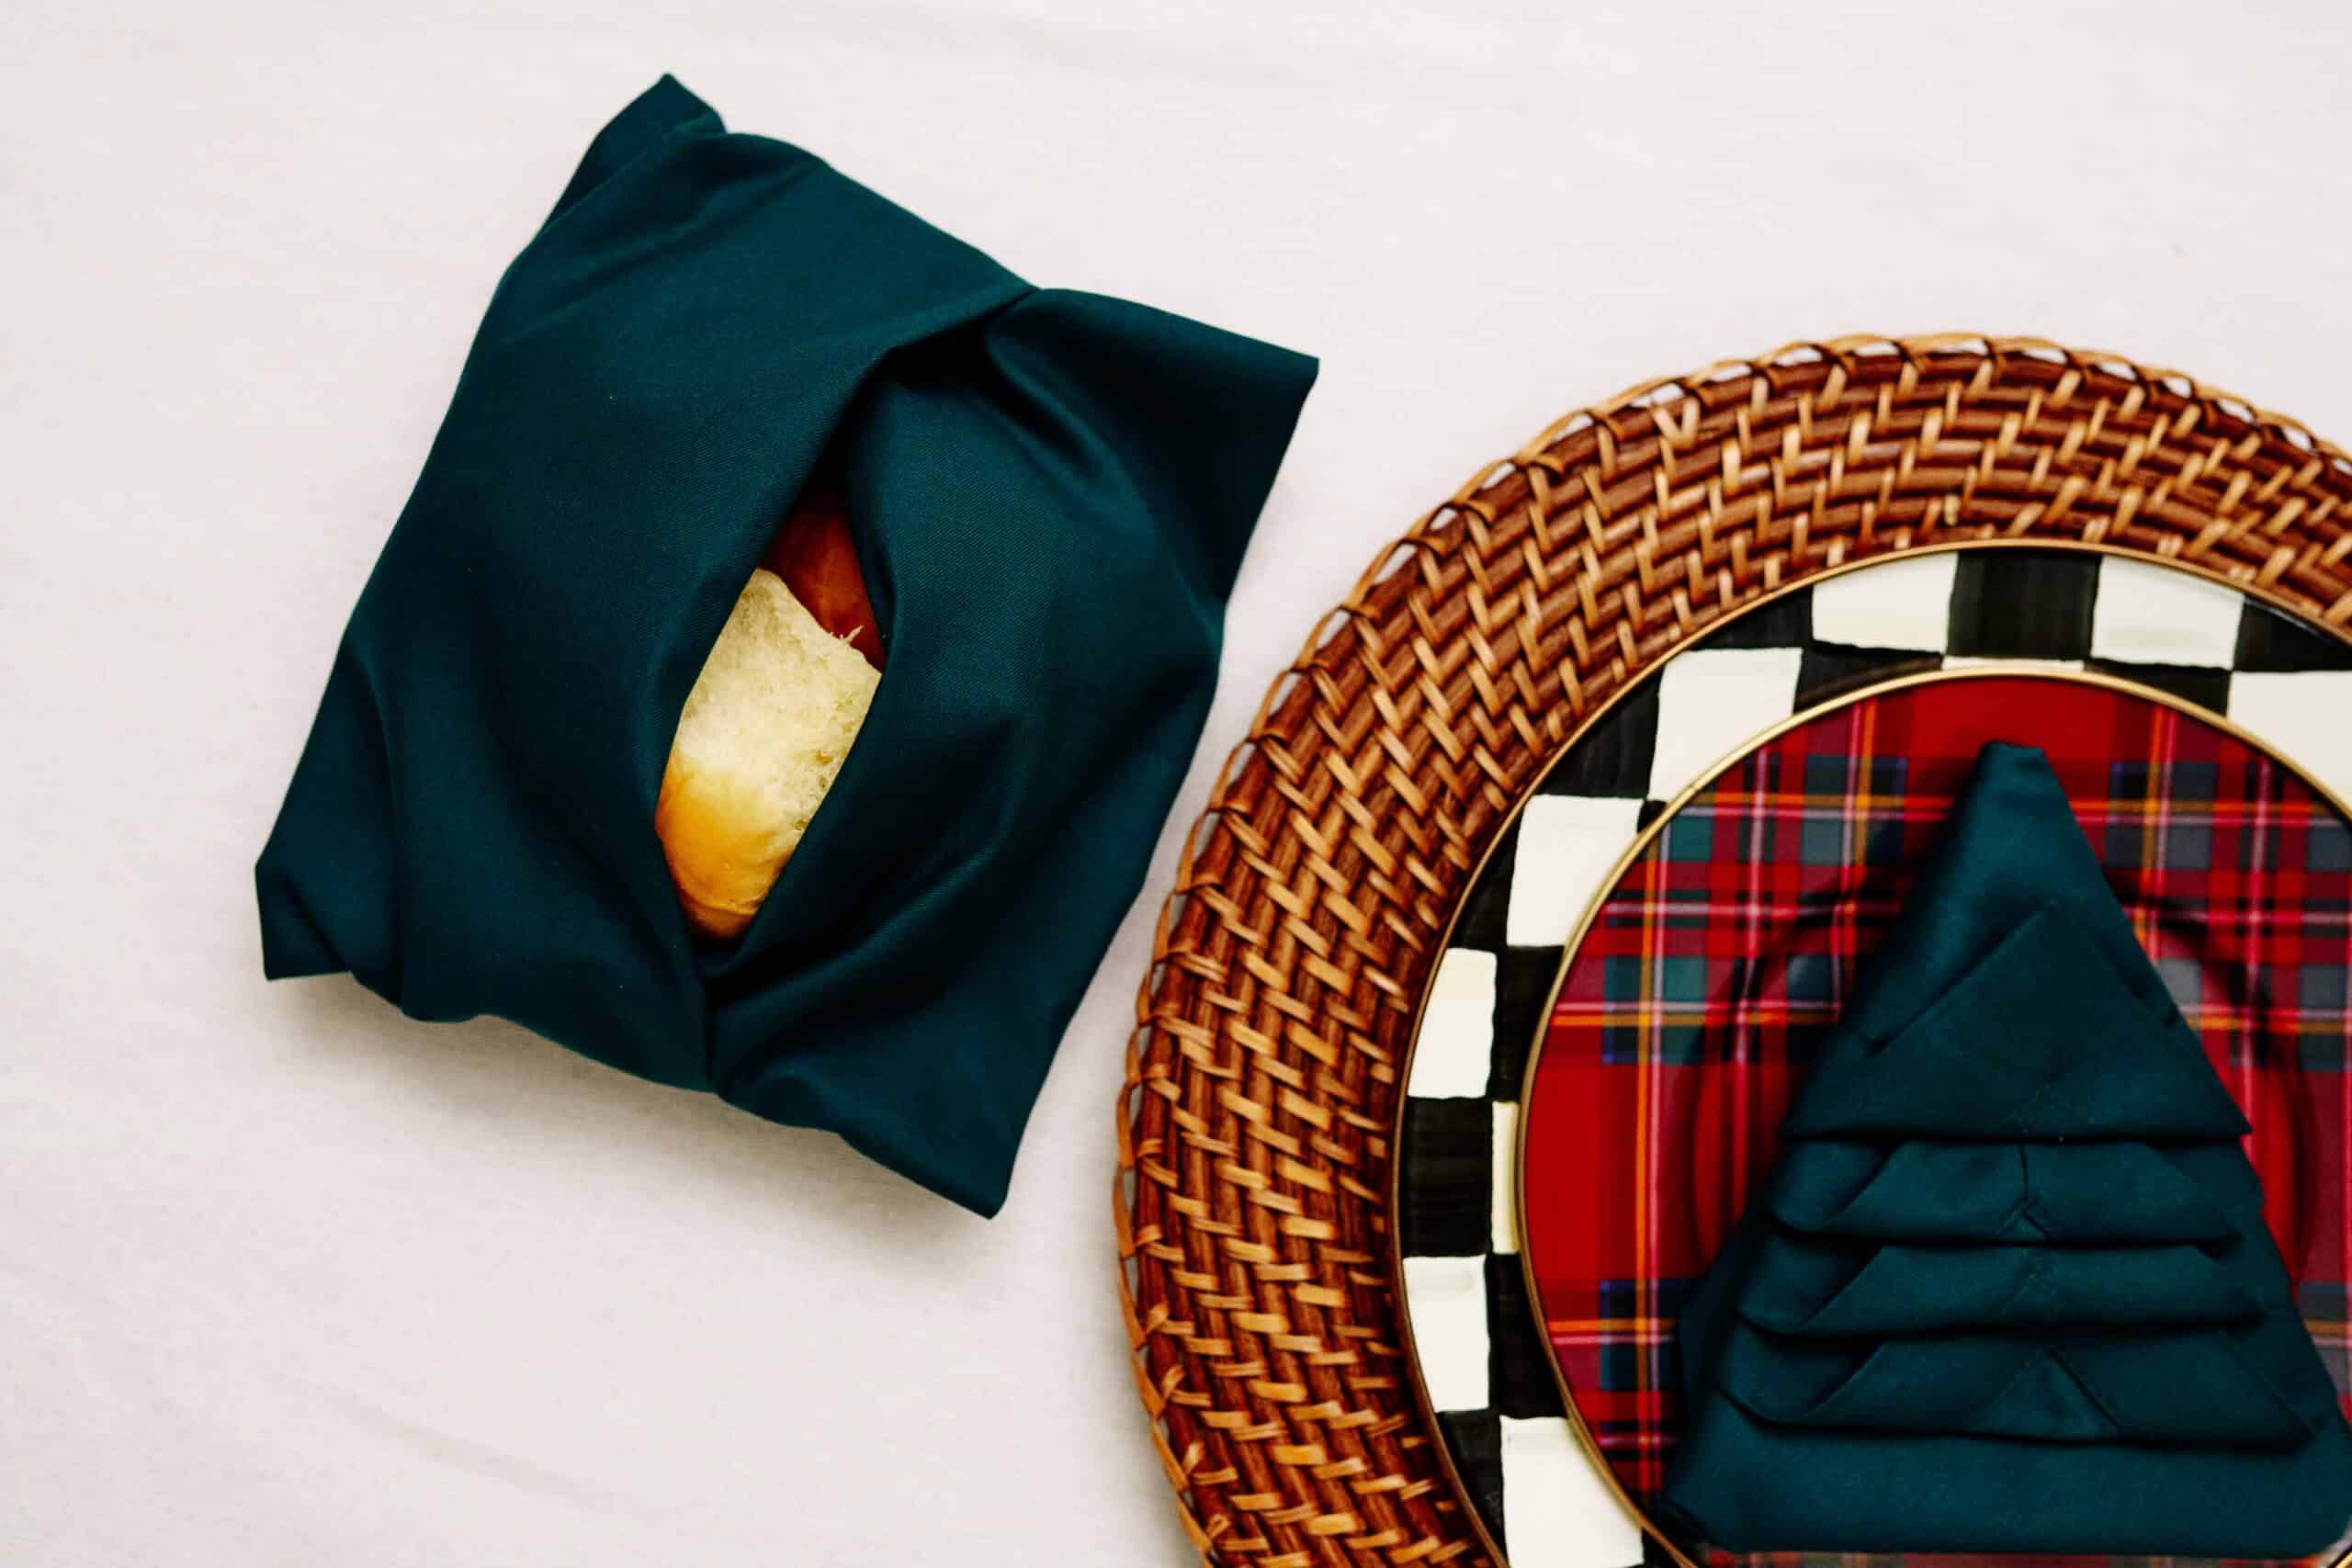
Bread Basket Fold
If you find yourself short on plates, use this clever bread basket napkin fold to hold your dinner rolls.
- Step 1: Start with a square, flat napkin.
- Step 2: Fold the bottom of your napkin up about an inch. Then fold that section again to the halfway point of the napkin The edge of the napkin should be hidden.
- Step 3: Repeat with the opposite half of the napkin. On the second fold, fold it a little bit more than halfway so that the napkin edges overlap about an inch.
- Step 3: Flip the napkin over and fold both sides in so that the napkin looks like a wide rectangle or square.
- Step 4: Flip the napkin over again, reaching your fingers into the overlapped section to carve out a little pocket. This is where you’ll add your brad for your bread basket napkin fold.
Easy Runner Napkin
- Step 1: Start with a square, flat napkin.
- Step 2: Fold the napkin into thirds with the left and right sides, as if you were folding a dish towel.
- Step 3: Fold the top of the napkin to the bottom of the napkin. The edges of the napkin should be closest to you.
- Step 4: Place the napkin on top of your dinner plate. The top of the napkin should be at the middle of the dinner plate, so that a little bit of the napkin hangs off at the bottom of it. Place your salad plate on top of the napkin for a layered look.
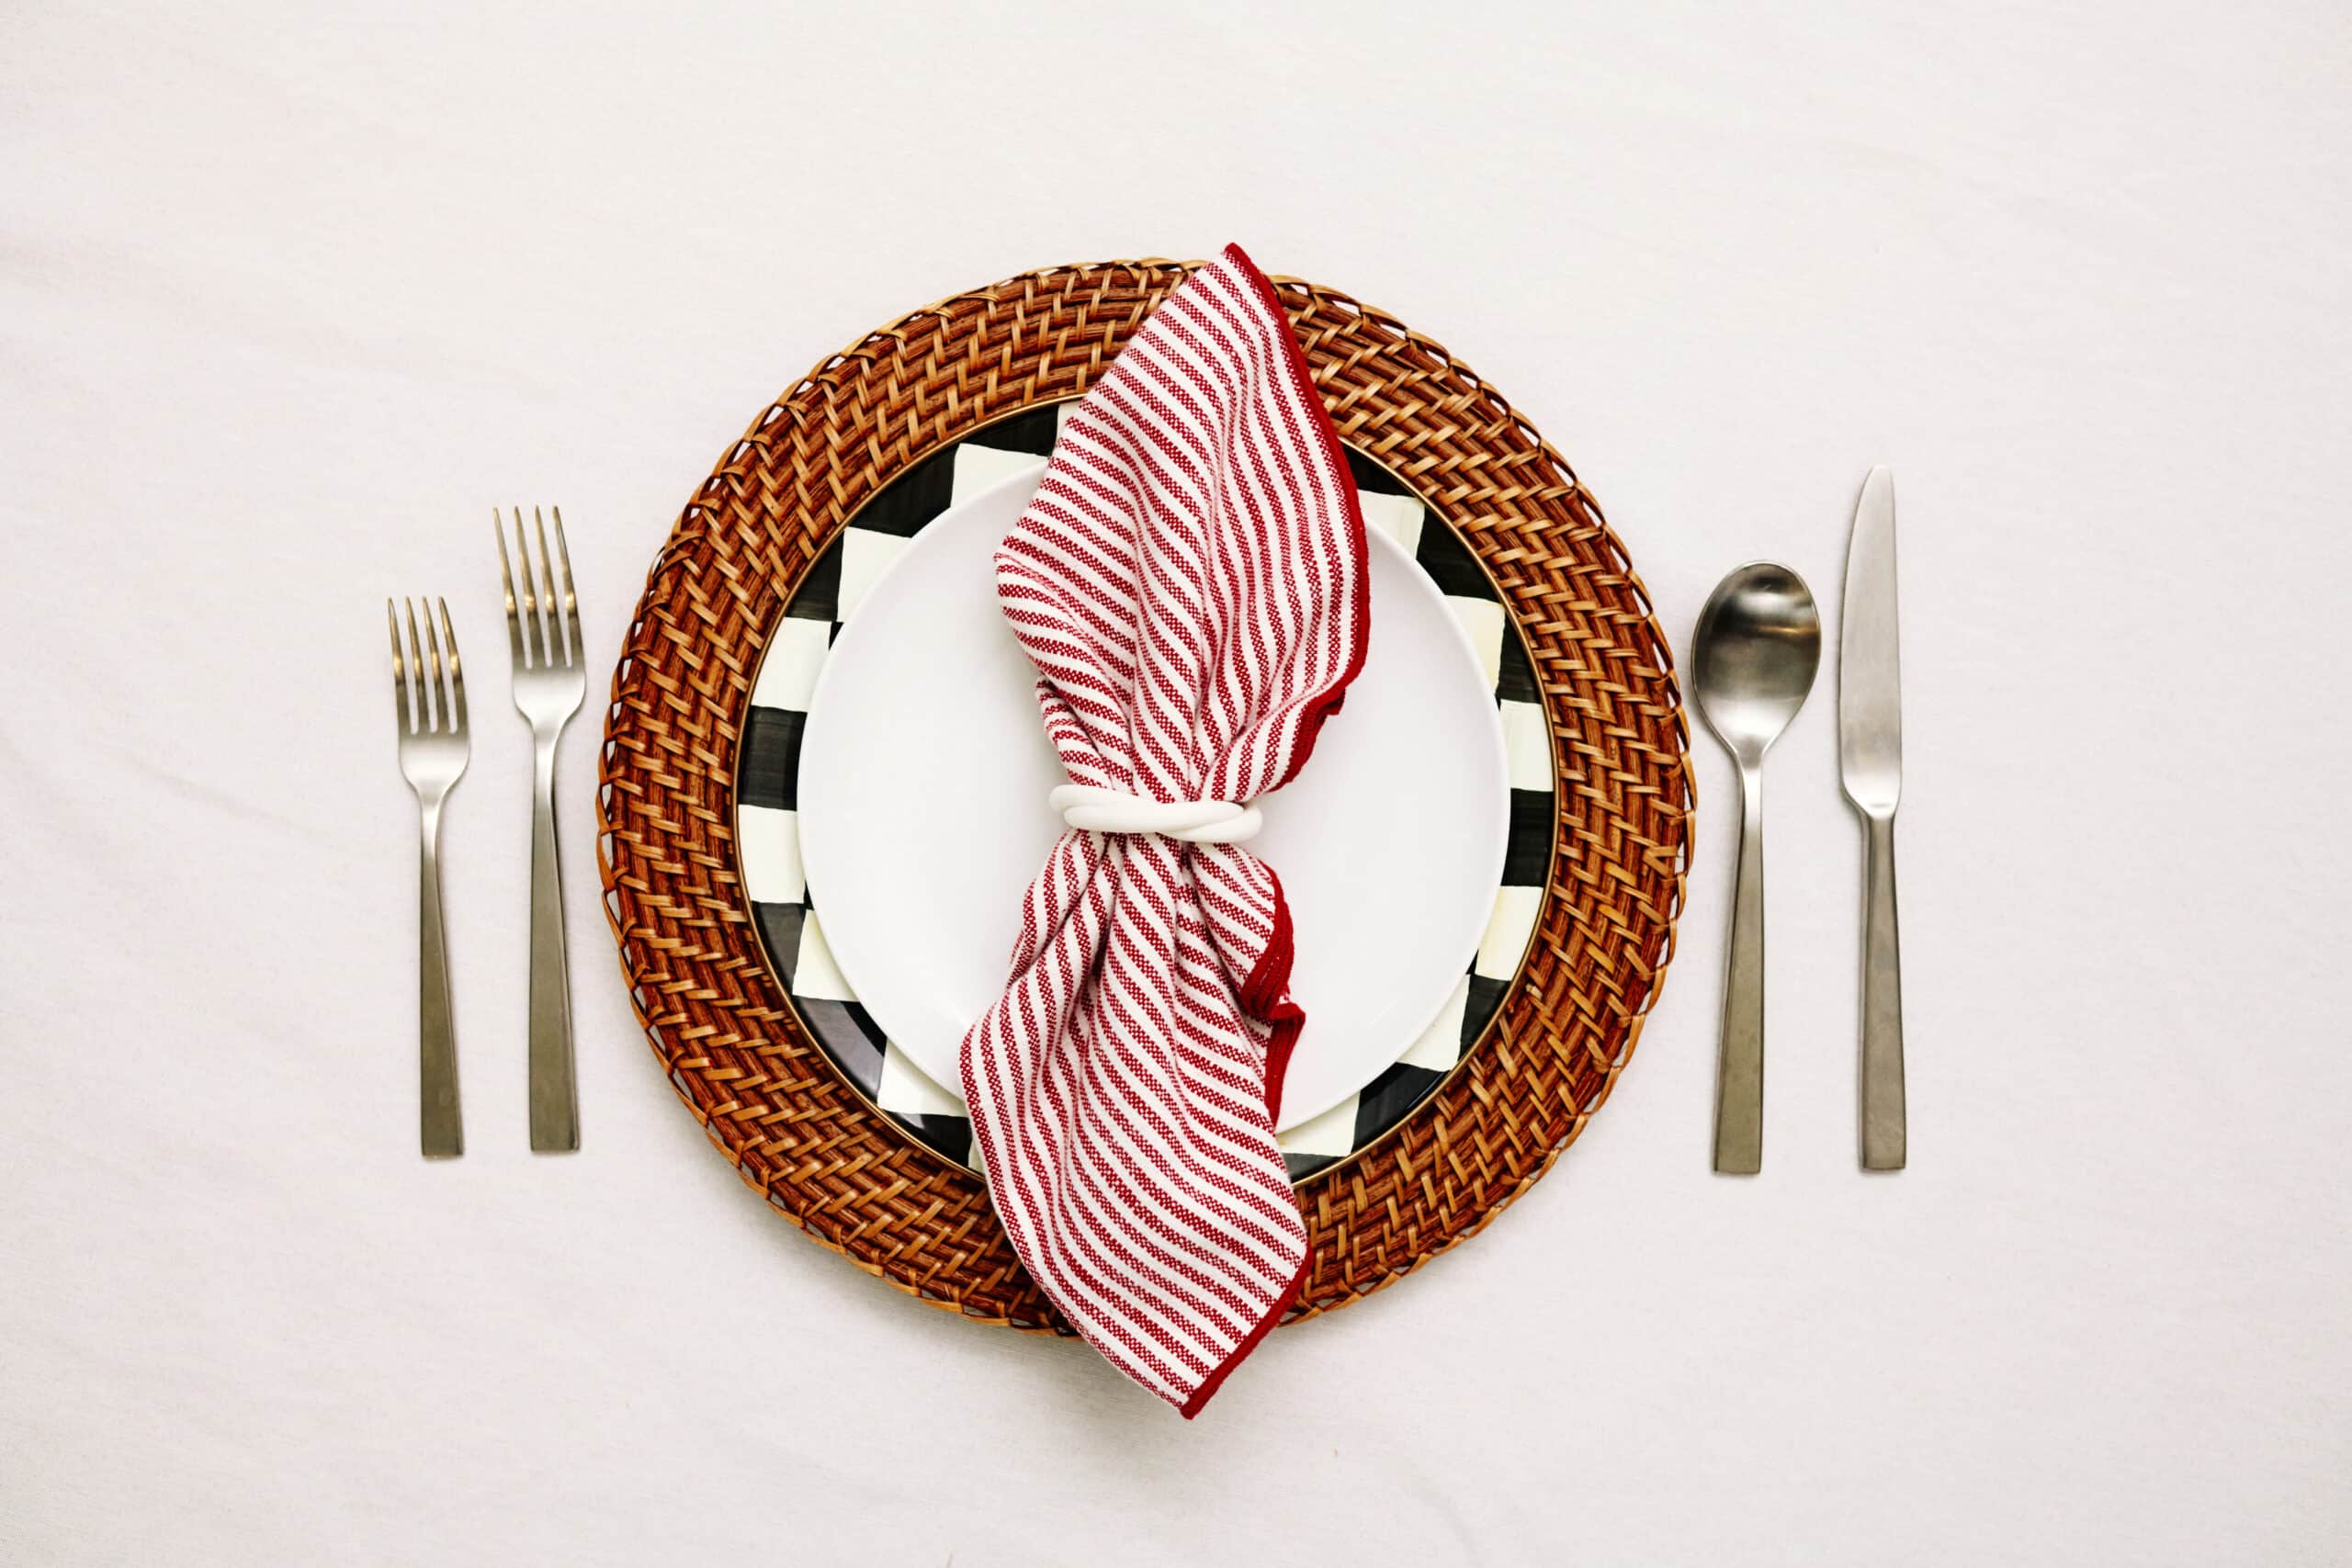
Knot Fold
- Step 1: Start with a flat napkin facing you with its corners to the sides like a diamond.
- Step 2: Fold the top and bottom corners so that they meet in the middle of the napkin. Then fold the top and bottom again to meet in the middle.
- Step 3: Fold the napkin in half lengthwise so that it’s long and skinny.
- Step 4: Grab both ends of the napkin and tie a knot in the center to complete your napkin knot fold.
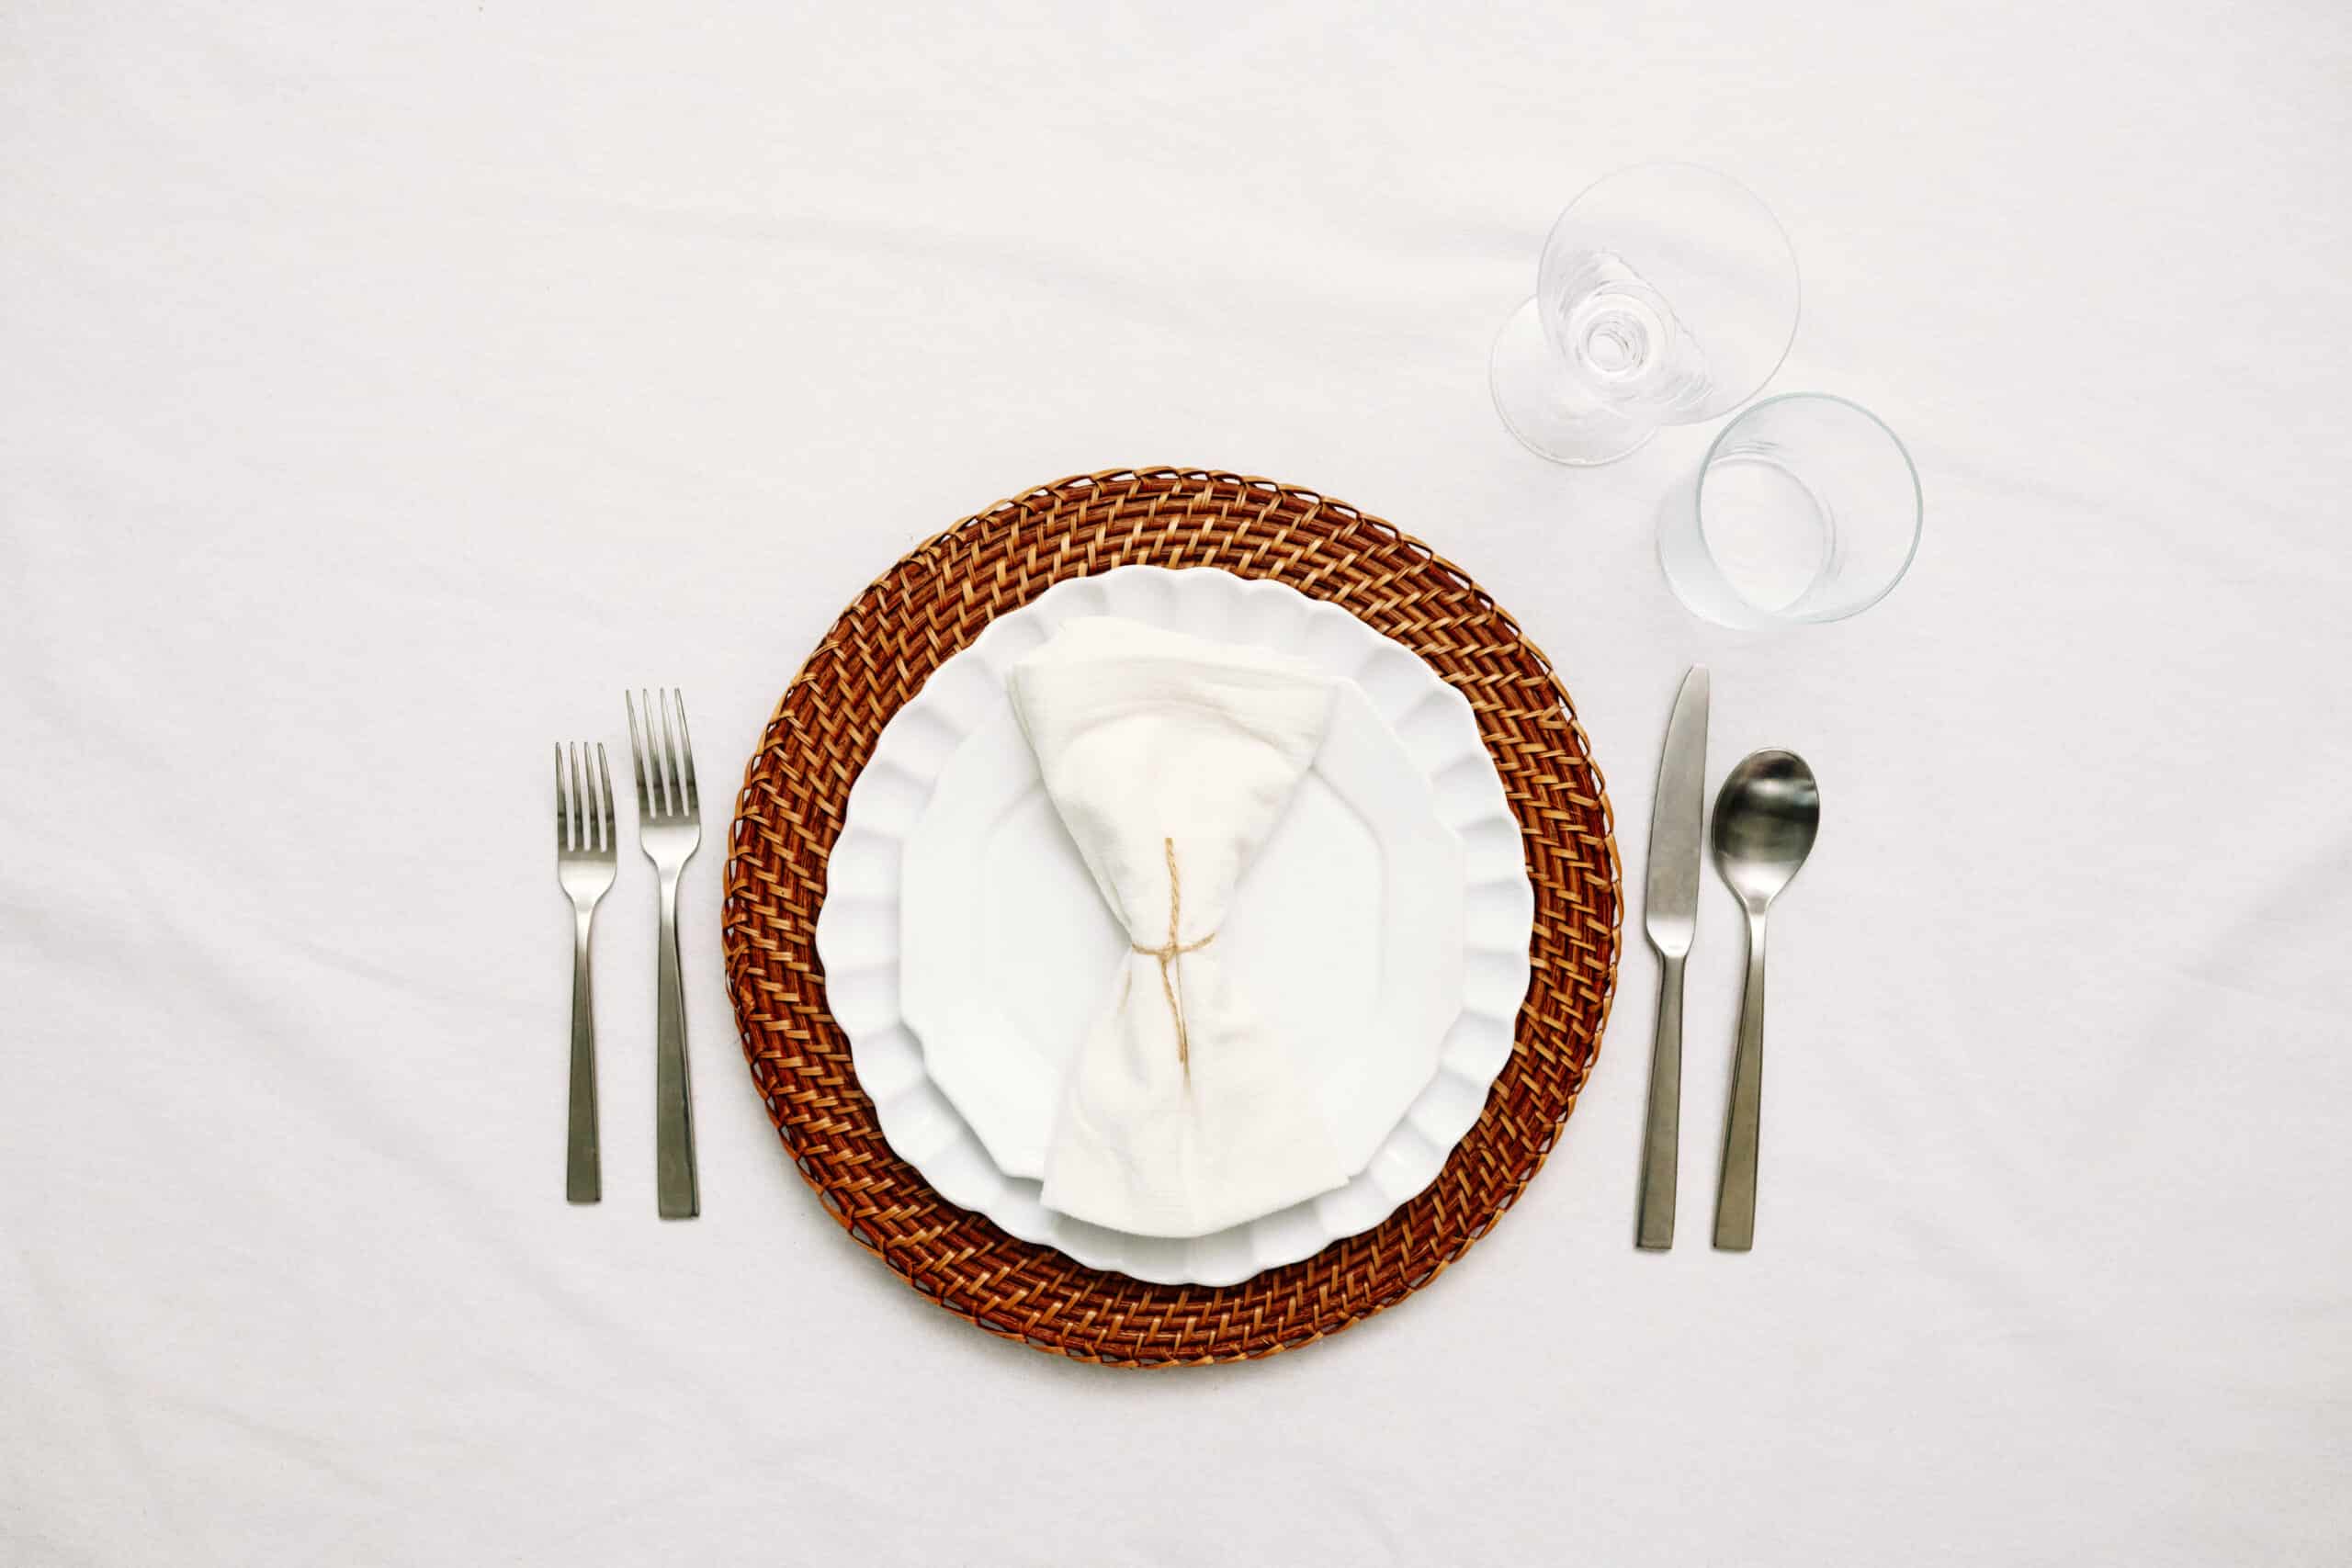
Rustic Fold with Jute
- Step 1: Start with a square, flat napkin.
- Step 2: Fold the napkin into thirds with the left and right sides, as if you were folding a dish towel.
- Step 3: Fold the napkin in half again, from top to bottom.
- Step 4: With a piece of jute or other string, tie the jute around the middle section of the napkin, gathering it a bit so that the napkin pinches in the center.
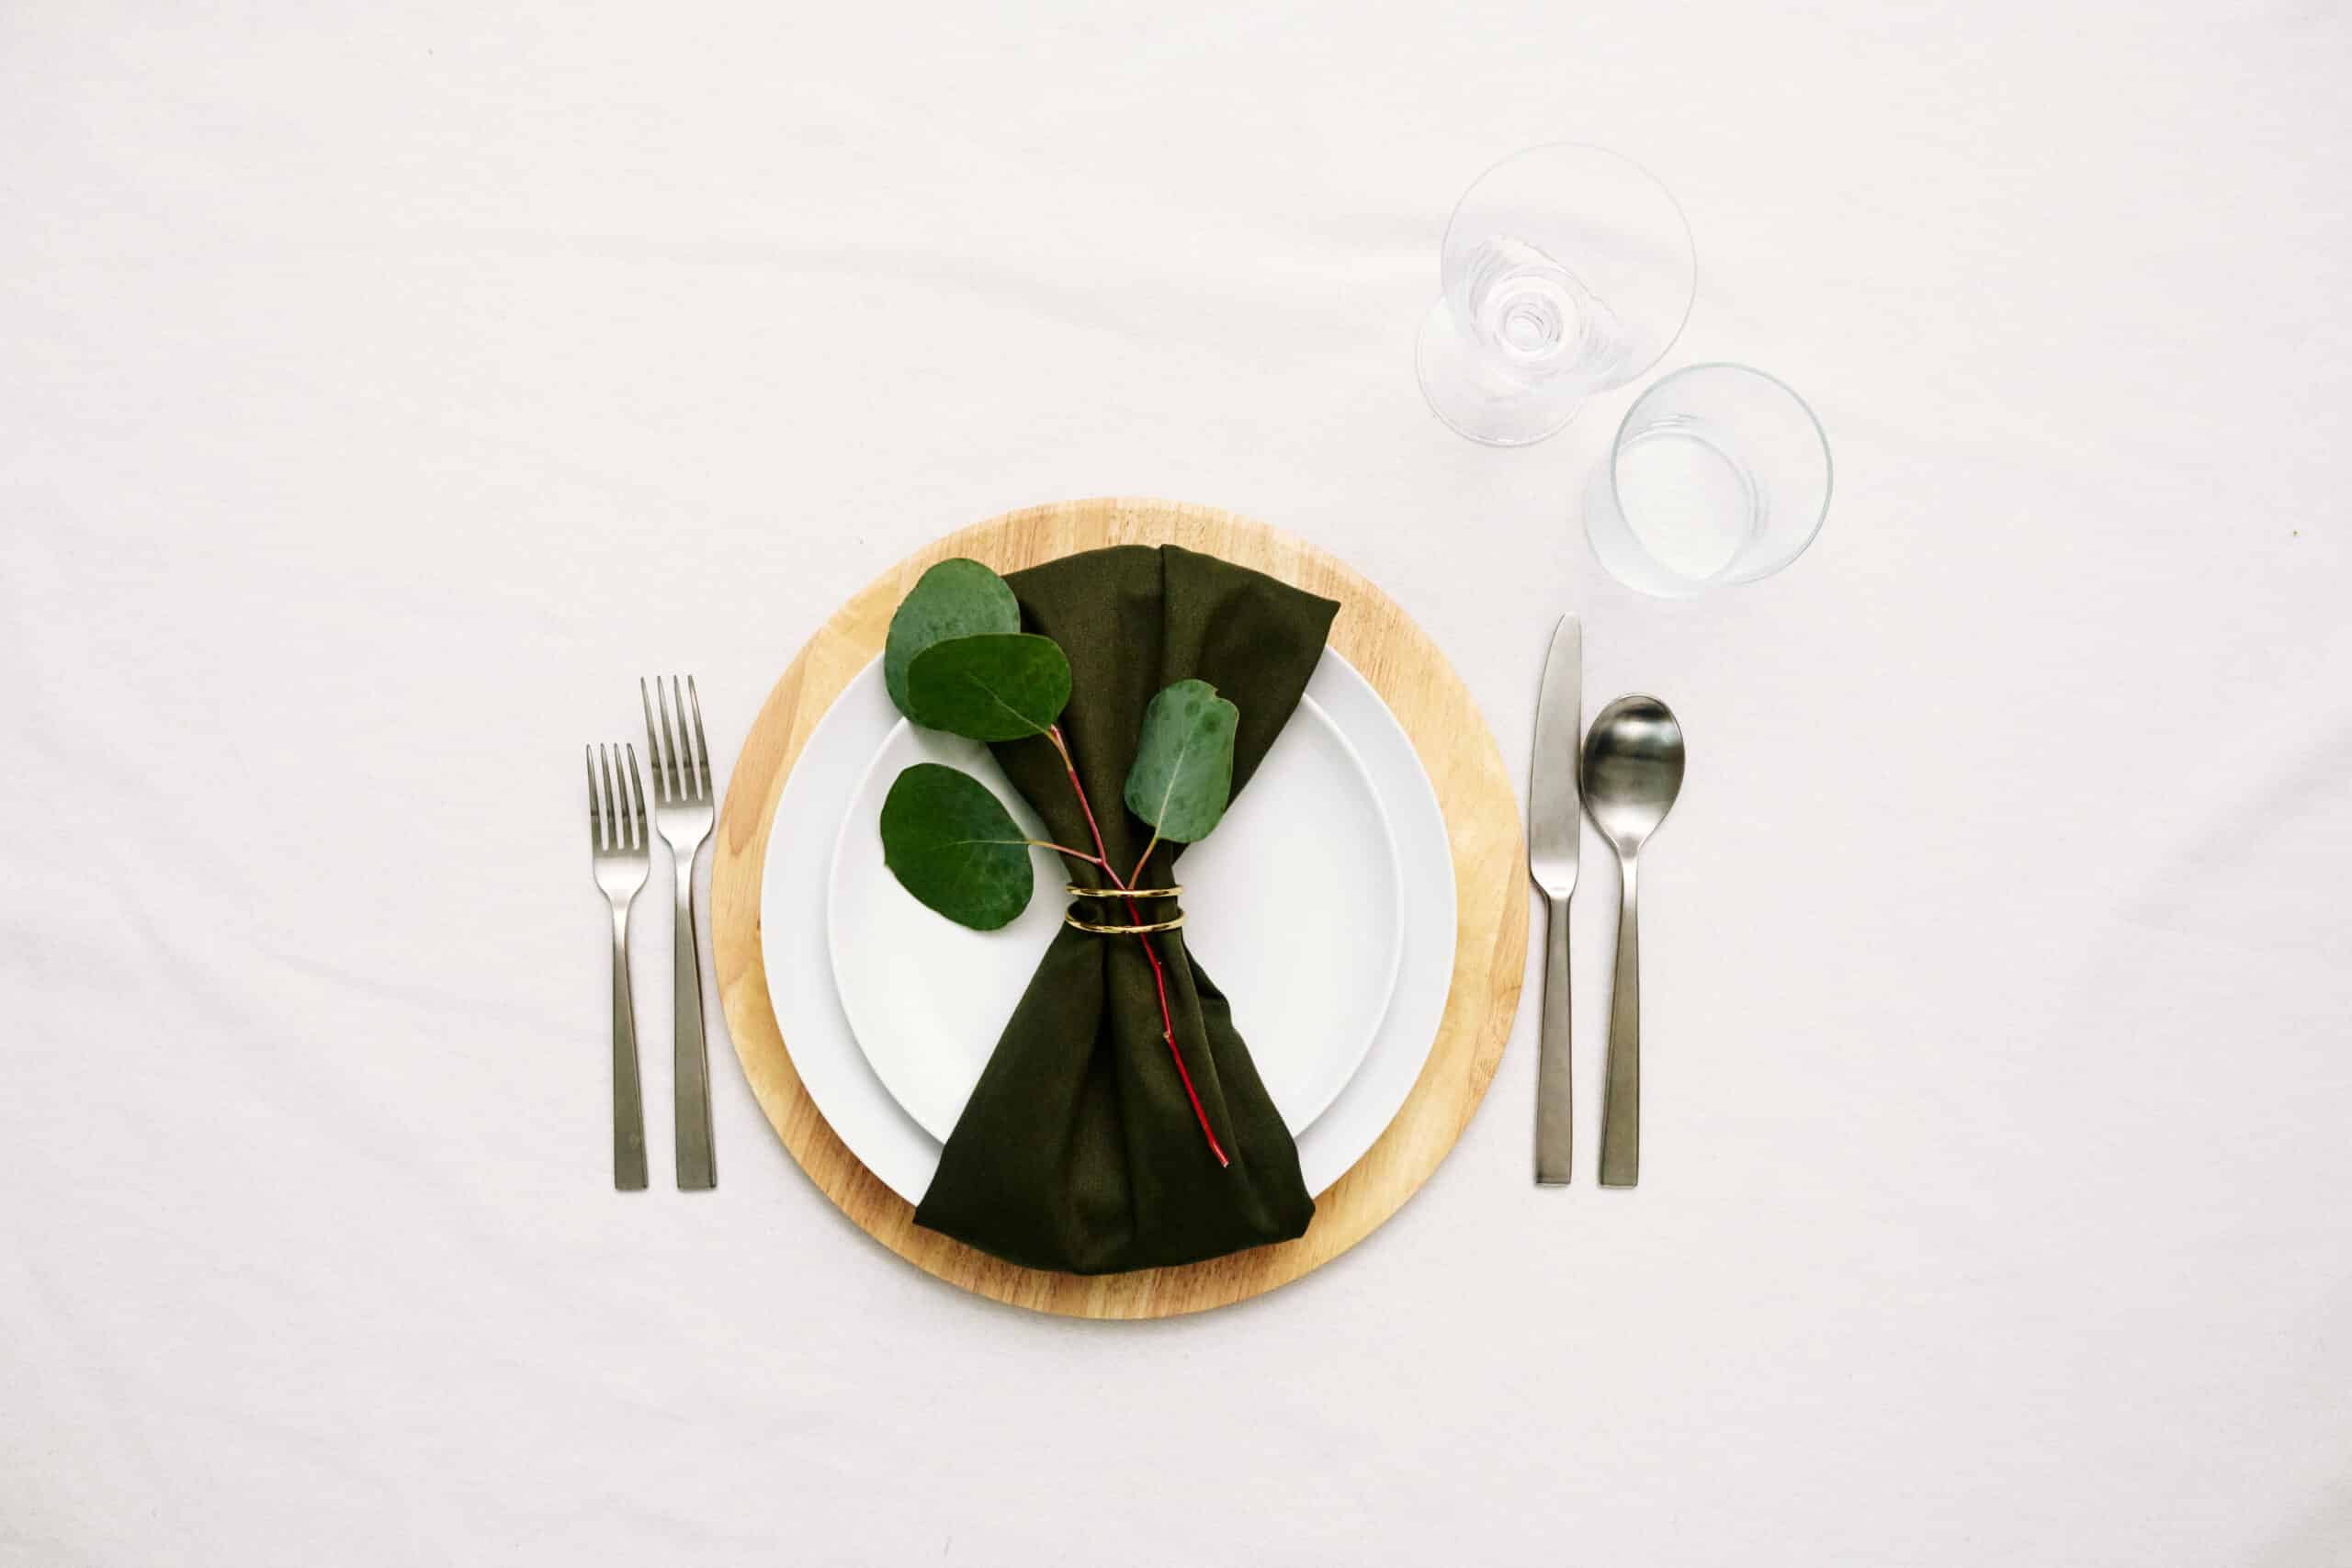
Plate Wrap with Napkin Ring
- Step 1: Start with a square, flat napkin.
- Step 2: Fold the napkin into thirds with the left and right sides, as if you were folding a dish towel.
- Step 3: Slide a napkin ring over the napkin to the center of the napkin. Keep the napkin long lengthwise from top to bottom.
- Step 4: Place a plate face down over the center of the napkin, then fold the napkin edges over the plate like how you would wrap a gift.
- Step 5: Flip the plate and napkin over together. Slide a flower, herb spring, or small branch into the napkin ring.
Shop Napkins & Napkin Rings