When I made these snowflake sugar cookies last week, I didn’t really plan on writing a post about them. But I got a handful of heart eyes and questions about them on Instagram, so here we are!
Today I’m sharing exactly how I made these snowflake sugar cookies and my tips and trick on how to decorate them. If you try them, be sure to tag me on Instagram @charmedbycamille!
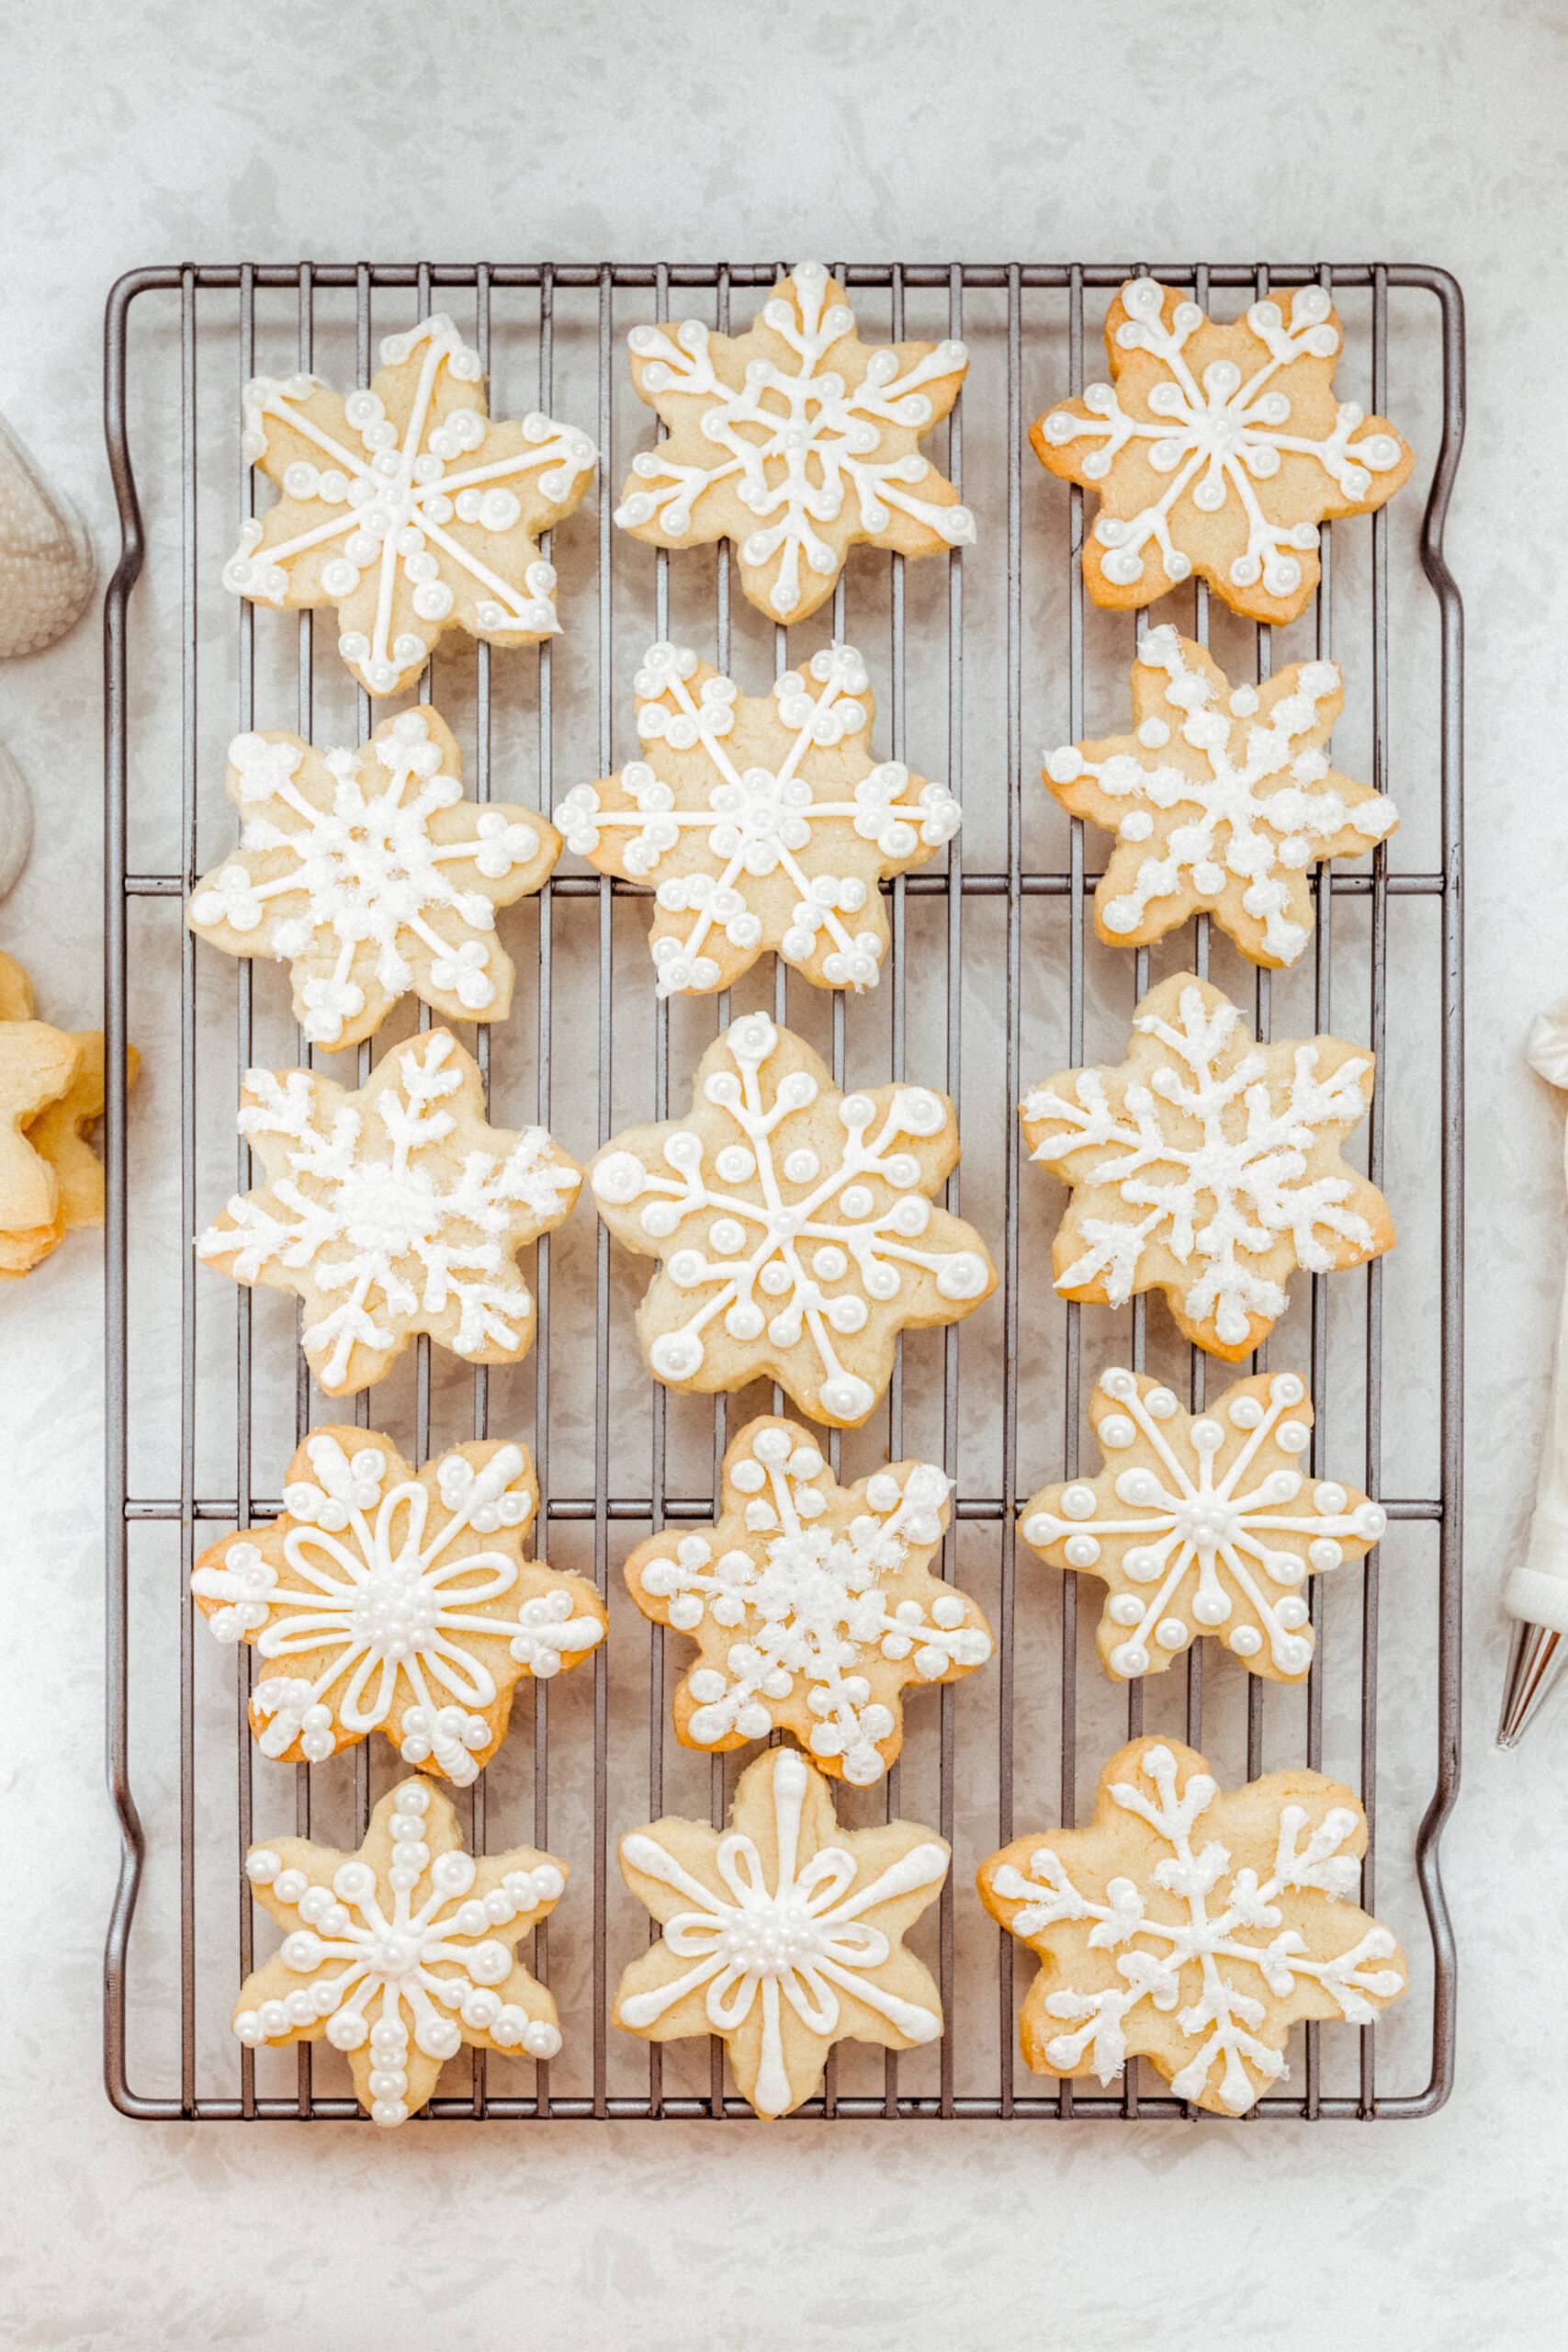


Snowflake Sugar Cookies
I first made these snowflake sugar cookies years ago for a holiday cookie exchange. I was looking for something festive but relatively easy to make, so I bought a cookie cutter and got to it! Ever since, they’ve been my go-to holiday cookie and they always seem to impress people.
My Favorite Sugar Cookie Mix
You don’t have to worry about making a fancy, from-scratch sugar cookie mix and then refrigerating the dough. Although it’s super fun to make cookies completely from scratch, I rarely have time for that.
My solution and no-fail mix for years has been Betty Crocker Sugar Cookie Mix. It comes in a bag or box, and the only other ingredients you’ll need for your mix is butter, one egg, and some extra flour.
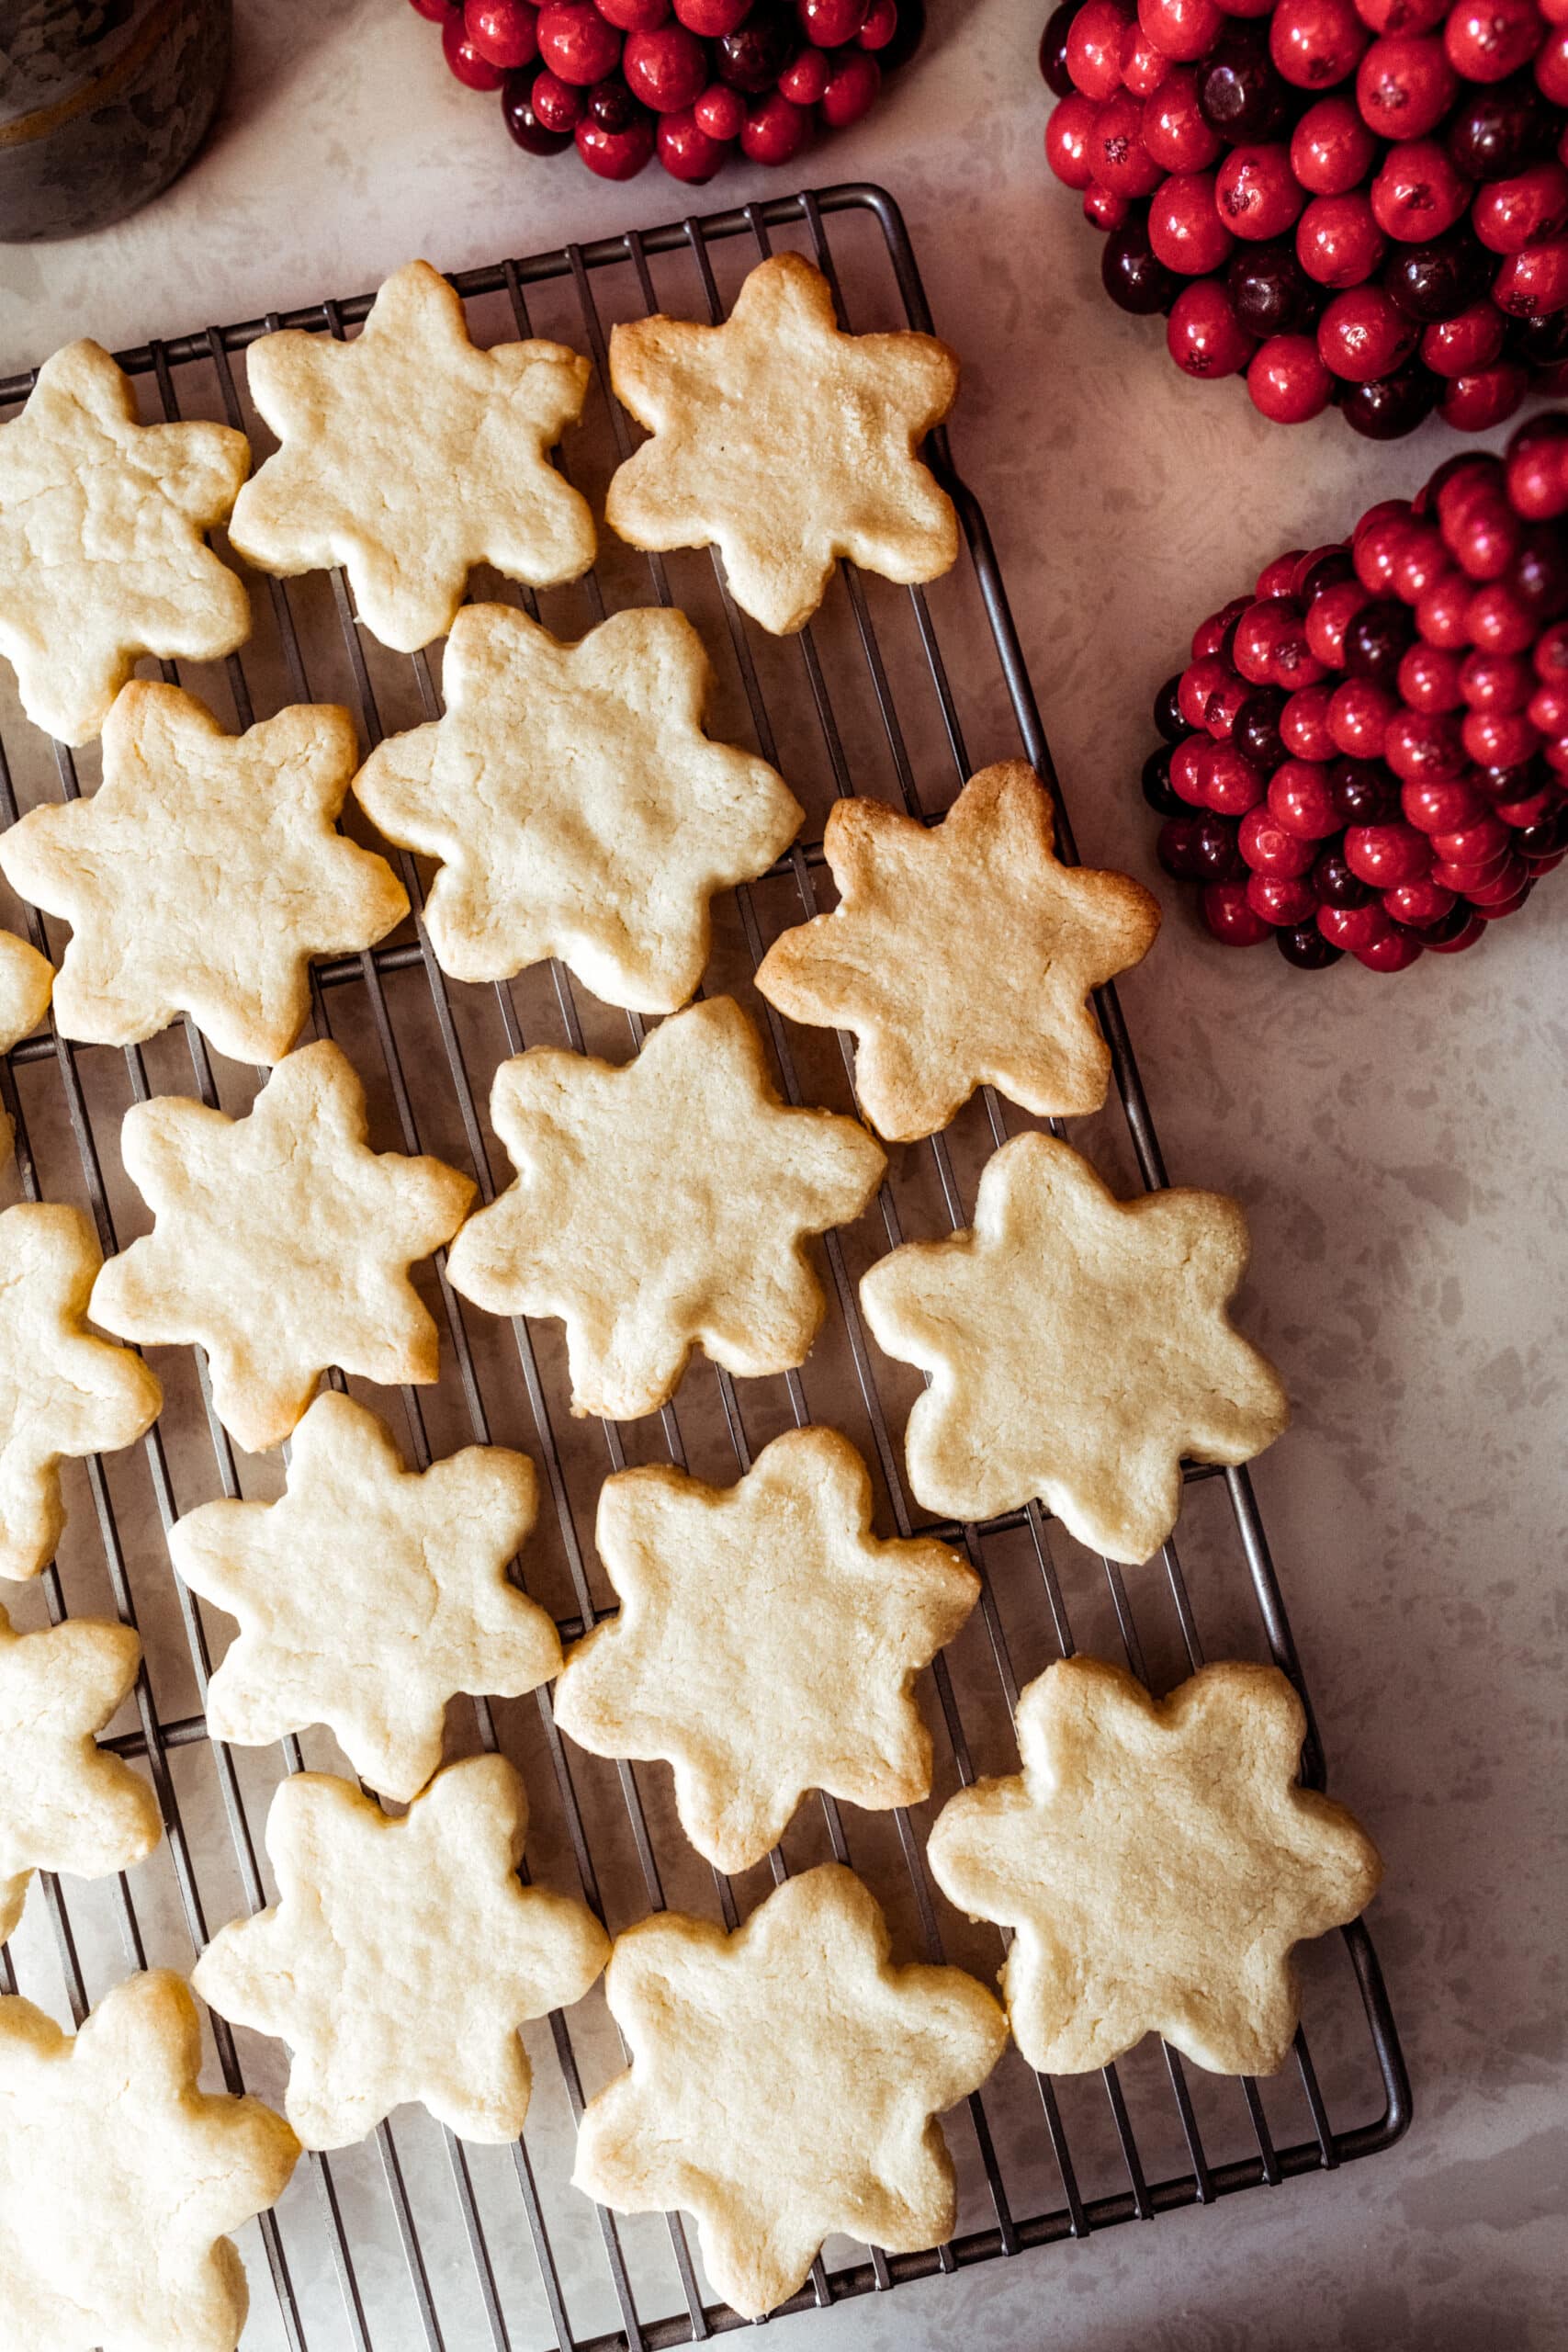
I don’t think I need to state the obvious here, but flour a surface and your rolling pin to roll out the dough for cutting. When rolling, be sure to roll your rolling pin one ONE direction only; don’t go back and forth. Roll out from a few different angles and make sure the dough is relatively even in all spots. Cut out cookies, then repeat rolling until you’re out of dough.

Tips on Decorating Snowflake Sugar Cookies
To decorate these snowflake sugar cookies, what is most important here is patience. Other than icing and some sprinkles or accents, you don’t need anything else. The decorating itself can be time-consuming, so make sure you give yourself time.
Decorating Tools
For these cookies I used a Wilton piping bag and a Round 5 decorating dip. (You could also use a Round 3 decorating tip if you want the icing lines on your cookies to be thinner.) If you use a piping bag, be sure you also by these couplers, which connect the decorating tip to your bag so icing doesn’t leak.
If you don’t have any of the above or don’t want to purchase them, another thing you can do is use a large gallon plastic bag as your decorating tool. Snip a tiny corner of the bag to create the opening for the icing. Be conservative when you cut, it’s better to snip a corner that’s too tiny then too big and waste a bunch of bags.
The latter is an easy hack, but the cut opening isn’t perfectly round like a decorating tip. I find that I have better precision when using a piping bag and tip vs. the plastic bag method, so if you can, buy the supplies.
Use the Right Icing
There are different types of icing and for these sugar snowflake cookies, you want to use royal icing. Royal icing hardens, so you don’t have to worry about icing sticking to the bottoms of all of your cookies, ruining your designs. Additionally, royal icing also clings onto things like sprinkles and holds them in place.
Traditional royal icing recipes use raw egg. I prefer to use meringue powder as an egg substitute and following the royal icing recipe on the back of the bag.
Decorating Tips
Since I only make these cookies once a year, I always forget how to decorate them. I myself Google “snowflake cookies” to get a kick start on decorating inspiration. No shame in my game! My internet search always serves as a creative starter and then I kind of just get in the groove and make up designs as I go.
Here are some other tips for decorating your snowflake sugar cookies:
- If you find that you’re good at one design, stick with it. I like to try different designs but I’m better at some than others.
- When putting the icing into your decorating bag, try to get the icing as close as possible to the tip opening. This helps to avoid air bubbles when squeezing.
- The great thing about royal icing is that if you mess up, you can quickly remove it off the cookie by swiping it off with a toothpick. It lifts relatively easily.
- I like to use edible pearl-like accents on some cookies and raw sugar crystal sprinkles on other cookies.
- If you have a wonky tip, line or end, you can always cover it with said accents or sprinkles.
If you’re looking for another holiday activity, try making DIY eucalyptus garland!


One Response
These look SO pretty and delicious. I’ve been in a major baking mood and the more complicated the better! Such a good distraction right now.
xo Jessica
an indigo day